The first time I watched my uncle break down a whole ahi at a family gathering, I was mesmerized. He stood at the folding table in the carport, a sharp knife in hand, and worked through that massive yellowfin tuna like he’d done it a thousand times — because he had. No wasted movement, no wasted fish. Within minutes, we had thick slabs for sashimi, perfect cubes for poke, and belly pieces set aside for grilling. “You gotta respect the fish,” he told me. “Use everything. Waste nothing.”
That lesson stuck with me, and it’s one I want to pass along to you. Whether you’re working with a whole ahi, a mahi mahi from the fish counter, or an ‘opelu (mackerel scad) from your local Asian market, knowing how to break down a whole fish is a fundamental Hawaiian kitchen skill. It saves you money, gives you better quality cuts, and connects you to a tradition that runs deep in island culture.
What Is Fish Butchery in Hawaiian Cooking?
In Hawai’i, fish isn’t just food — it’s culture. The Hawaiian word for fish is i’a (ee-ah), and traditionally, knowing how to catch, clean, and prepare fish was an essential life skill. Different cuts of fish serve different purposes: the loin for sashimi, the belly for grilling, the head and bones for stock, the collar (kama) for broiling.
Free: Hawaiian Cooking Starter Kit
Get 5 essential island recipes + a printable pantry checklist — everything you need to start cooking Hawaiian at home.
No spam, ever. Unsubscribe anytime.
Fish butchery, or breaking down a whole fish, means taking a whole fish and separating it into usable portions. It’s different from simply filleting because the goal is to maximize every part of the fish, not just pull off two fillets and toss the rest.
Why This Matters in Hawaiian Cooking
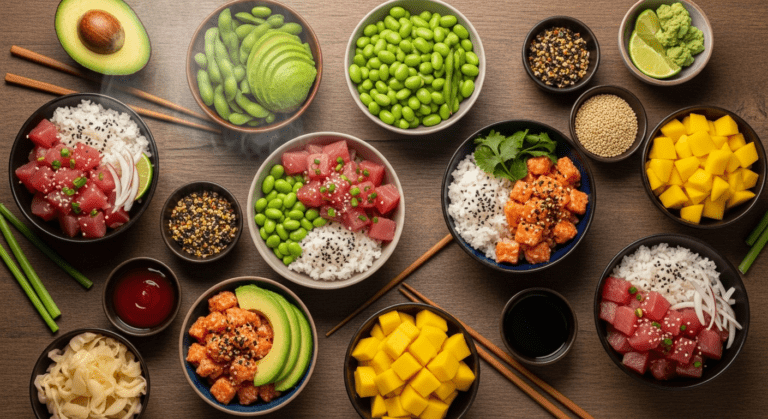
Hawaiian cuisine is built on fresh fish. Poke alone demands high-quality, fresh-cut fish — and the best poke starts with a whole fish you break down yourself. To understand the deep tradition behind this beloved dish, read our Talk Story: Art of Poke. Here’s why this skill matters:
- Freshness: A whole fish is easier to judge for freshness than pre-cut fillets. You can check the eyes, gills, and smell.
- Economy: Buying whole fish is significantly cheaper per pound than buying fillets. On the mainland, a whole ahi or mahi mahi can save you 30-50% compared to buying loin cuts.
- Versatility: One fish gives you multiple meals — sashimi, poke, grilled fillets, fish stock, and grilled collar.
- Respect: In Hawaiian culture, using the whole fish honors the animal and the ocean. It’s about stewardship, not just cooking.
Essential Tools
Before you start, make sure you have these tools ready:
- A sharp, flexible fillet knife (7-9 inches): This is your primary tool. It needs to be razor sharp — dull knives are dangerous and damage the flesh. For help selecting the right blade, see our fish knife guide.
- A sturdy chef’s knife or deba (Japanese fish knife): For cutting through the spine and head.
- Kitchen shears: For cutting fins and trimming.
- A large cutting board: Ideally one that won’t slide around. Place a damp towel underneath.
- A bowl of ice water: For rinsing fillets and keeping them cold.
- Clean towels: For gripping the fish and keeping your work area clean.
How to Break Down a Whole Fish: Step by Step
I’ll walk you through the process using a round fish like mahi mahi or ahi. The technique is similar for most Hawaiian fish species.
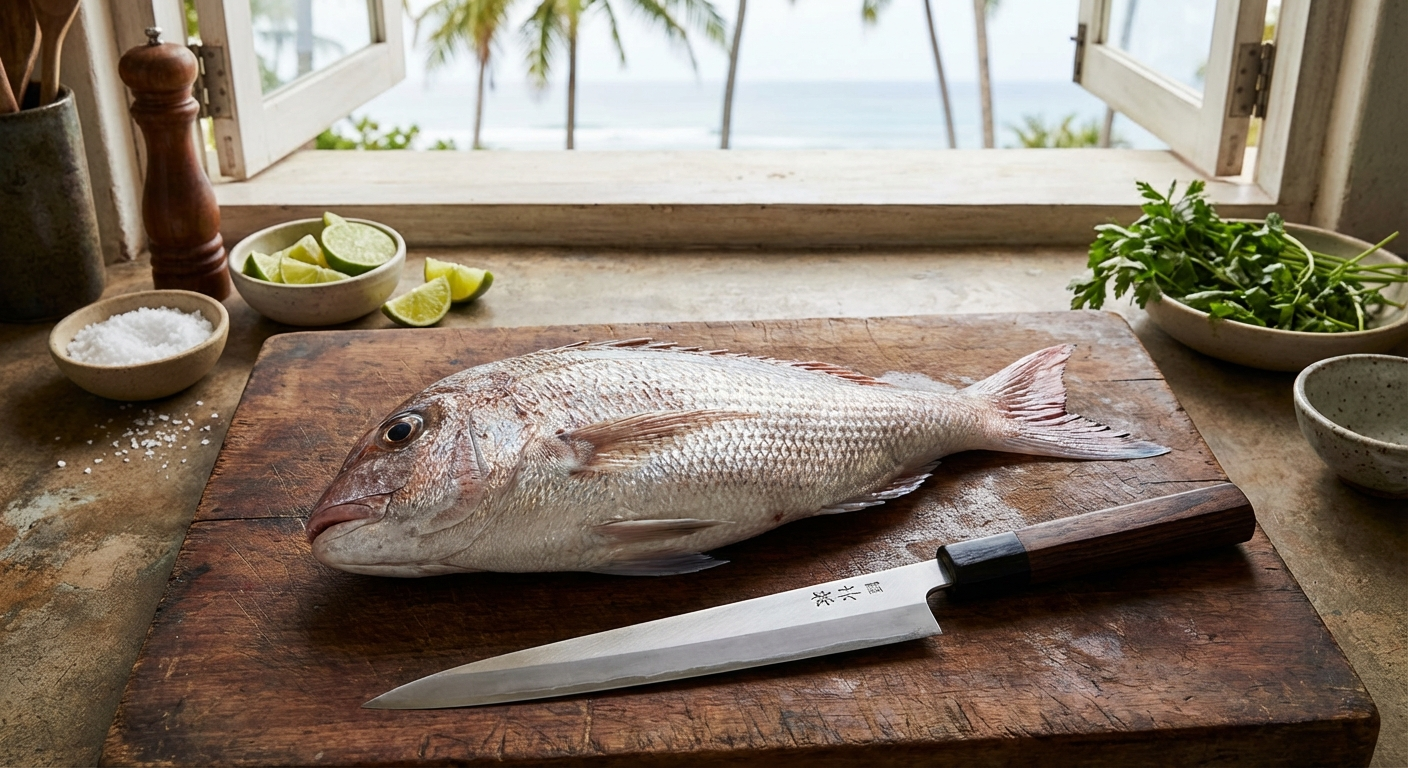
Step 1: Inspect and Scale
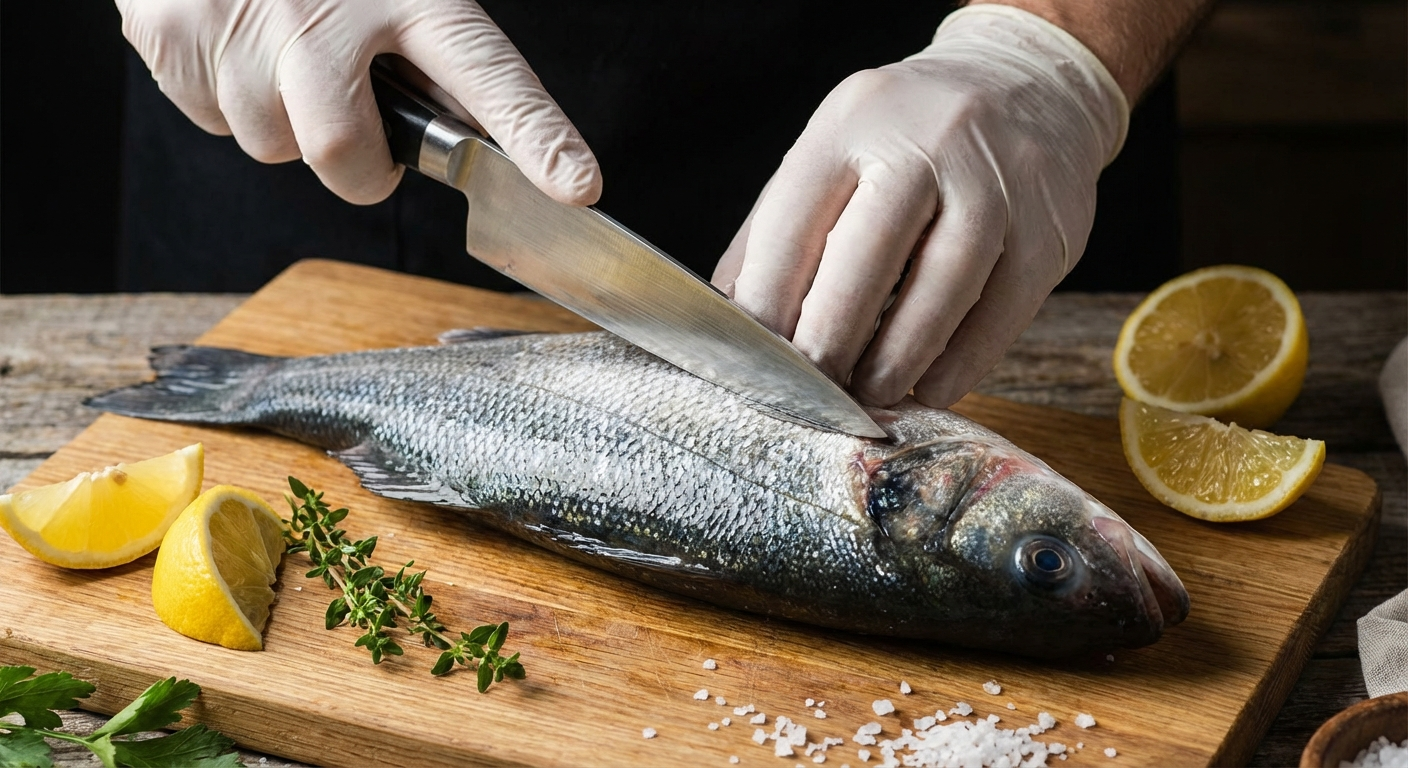
Check your fish for freshness: clear eyes, bright red gills, firm flesh, and a clean ocean smell. If the fish has scales (mahi mahi does, ahi doesn’t), remove them by scraping from tail to head with the back of your knife or a fish scaler. Do this outside or in the sink — scales fly everywhere.
Step 2: Remove the Fins
Using kitchen shears or your chef’s knife, cut away the dorsal (top), pectoral (side), and anal (bottom) fins. Cut close to the body. These fins have sharp spines, so be careful.
Step 3: Gut the Fish
Insert the tip of your knife into the belly near the anal vent and cut forward toward the head. Open the cavity and remove all the innards. Rinse the cavity thoroughly with cold water. Save the liver if it looks healthy — some cooks prize it.
Step 4: Remove the Head
Cut behind the pectoral fin and gill plate on both sides, angling your knife toward the head. Cut through the spine with your chef’s knife or a firm downward press. Set the head aside — don’t throw it away. The head makes incredible stock, and the cheeks are a delicacy.
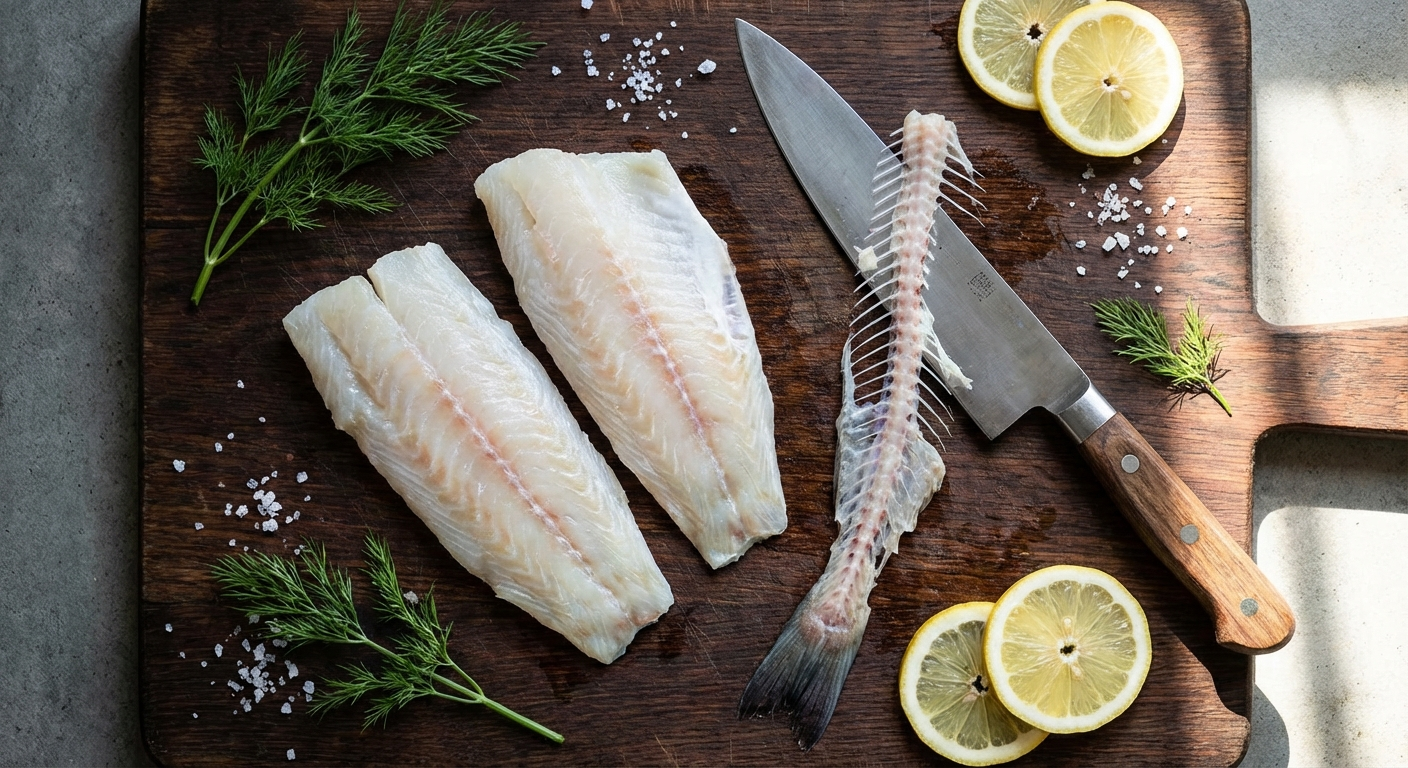
Step 5: Fillet the Fish
This is where your fillet knife earns its keep. Starting at the head end, insert the blade along the backbone and make long, smooth strokes toward the tail. Let the knife ride along the rib bones — you should be able to feel them through the blade. Keep the knife angled slightly toward the bones to leave as little flesh behind as possible.
Flip the fish and repeat on the other side. You should now have two fillets and a skeleton.
Step 6: Remove the Rib Bones
Lay each fillet skin-side down. You’ll see the rib bones curving away from the center. Slide your knife under them at an angle and carefully separate them from the flesh. This takes practice — go slow and waste as little meat as possible.
Step 7: Remove Pin Bones
Run your fingers along the center line of each fillet. You’ll feel small, thin bones poking up. Pull them out one at a time using fish tweezers or needle-nose pliers. Always pull in the direction the bone is angled — usually toward the head end.
Step 8: Skin the Fillets (Optional)
For poke and sashimi, you’ll want skinless fillets. Lay the fillet skin-side down, grip the tail end of the skin, and slide your knife between the flesh and skin with a gentle sawing motion. Keep the blade angled slightly downward toward the skin.
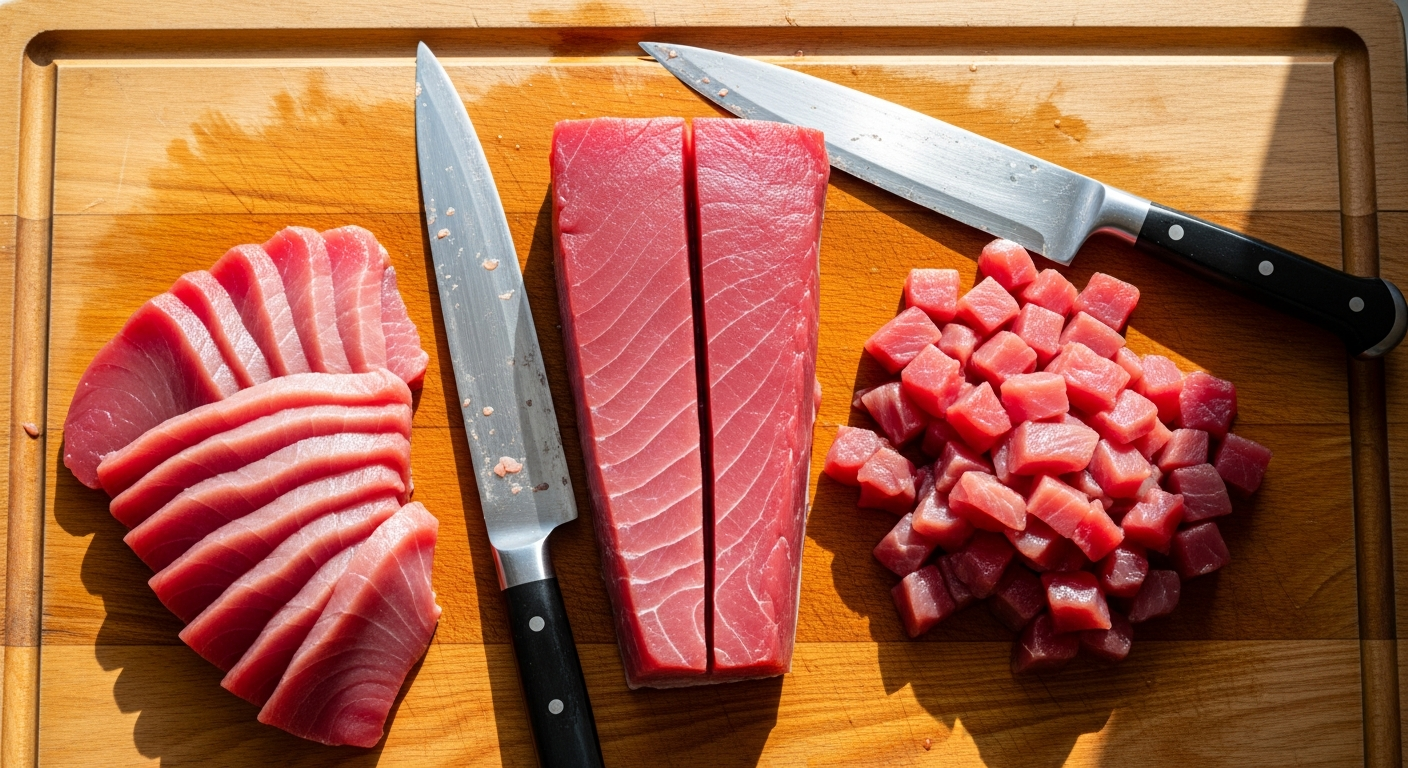
Step 9: Portion Your Cuts
Now you have beautiful, boneless fillets. Here’s how to portion them for different Hawaiian dishes:
- For Poke: Cut into 3/4-inch cubes. Cut against the grain for the best texture.
- For Sashimi: Cut thin slices on a bias, about 1/4-inch thick. Use a single, smooth pulling motion — don’t saw.
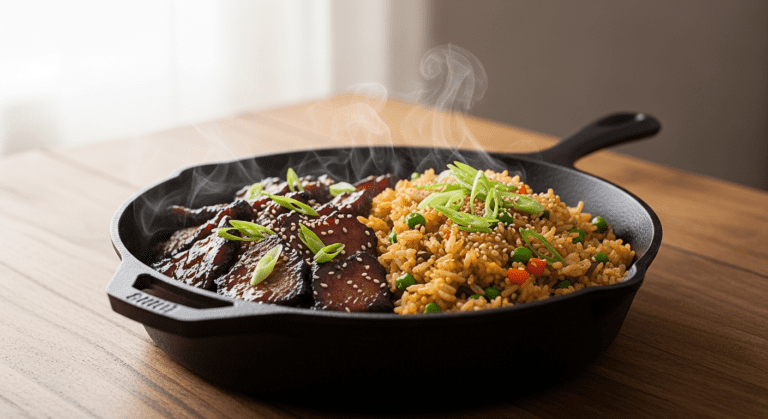
- For Grilling: Cut into steaks or portions about 1 to 1.5 inches thick.
- For Pan-Searing: Leave in larger fillet portions, about 6 ounces each. Try our Furikake Salmon or Misoyaki Butterfish for delicious pan-seared preparations.
Don’t Waste the Rest
A whole-fish mentality means using everything:
- Head and bones: Make dashi or fish stock. Roast them first for deeper flavor.
- Collar (kama): Broil with a little salt and a squeeze of lemon. This is a prized cut in Japanese and Hawaiian cuisine.
- Cheeks: Pan-sear them like scallops. They’re incredibly tender and sweet.
- Belly: Fattier and richer than the loin — perfect for grilling or searing.
Tips for Mainland Cooks
Finding whole fish on the mainland takes a little effort, but it’s worth it:
- Visit Asian supermarkets — they almost always carry whole fish and the staff can help you select one.
- Build a relationship with your local fish counter. Ask them to hold a whole fish for you or to special-order one.
- If you can’t find ahi, try yellowtail, salmon, or even striped bass for poke-style preparations. Check our guide to Hawaiian ingredients for substitution ideas.
- Keep everything cold. Work quickly and keep a bowl of ice nearby. Fish quality deteriorates fast at room temperature.
Key Things to Know
- A sharp knife is essential. Dull knives damage flesh and are more dangerous. Sharpen before every use.
- Let the bones guide your blade. Feel the skeleton through your knife and follow it closely to maximize yield.
- Use the whole fish. Head, collar, cheeks, belly, bones — every part has a purpose in Hawaiian cooking.
- Buy whole when possible. It’s fresher, cheaper, and more versatile than pre-cut fillets.
- Practice makes perfect. Start with smaller, cheaper fish like ‘opelu or akule before working up to a whole ahi.
- Keep it cold. Fish quality depends on temperature control from market to plate.
Breaking down a whole fish is one of those skills that feels intimidating until you’ve done it a few times. Once you get the hang of it, you’ll never want to buy pre-cut fillets again. There’s something deeply satisfying about turning a whole fish into a spread of fresh poke, sashimi, and grilled collar — all from one trip to the fish market. Your family and friends will think you’re a pro, and honestly, after a few rounds of practice, you will be.