First time I had butter mochi was at a potluck at Ala Moana Beach Park, summer 2004. Someone’s aunty brought a 9×13 pan, set it on the picnic table, and by the time I got there it was down to corner pieces. One bite and I understood why — that golden-brown top giving way to this impossibly chewy, coconut-sweet center that wasn’t cake, wasn’t pudding, wasn’t mochi, but somehow all three at once. I’ve spent years perfecting this butter mochi recipe, learning exactly why some batches come out perfectly chewy while others turn dense or dry.
Butter mochi is one of those desserts that seems simple until you try to make it. The ingredient list is short. The method looks straightforward. But get the ratios or technique even slightly wrong, and you end up with something that’s either gummy and undercooked or hard and overbaked. This recipe gets it right — that impossible texture that makes butter mochi one of Hawaii’s most beloved desserts.
What Makes Butter Mochi Different From Regular Mochi
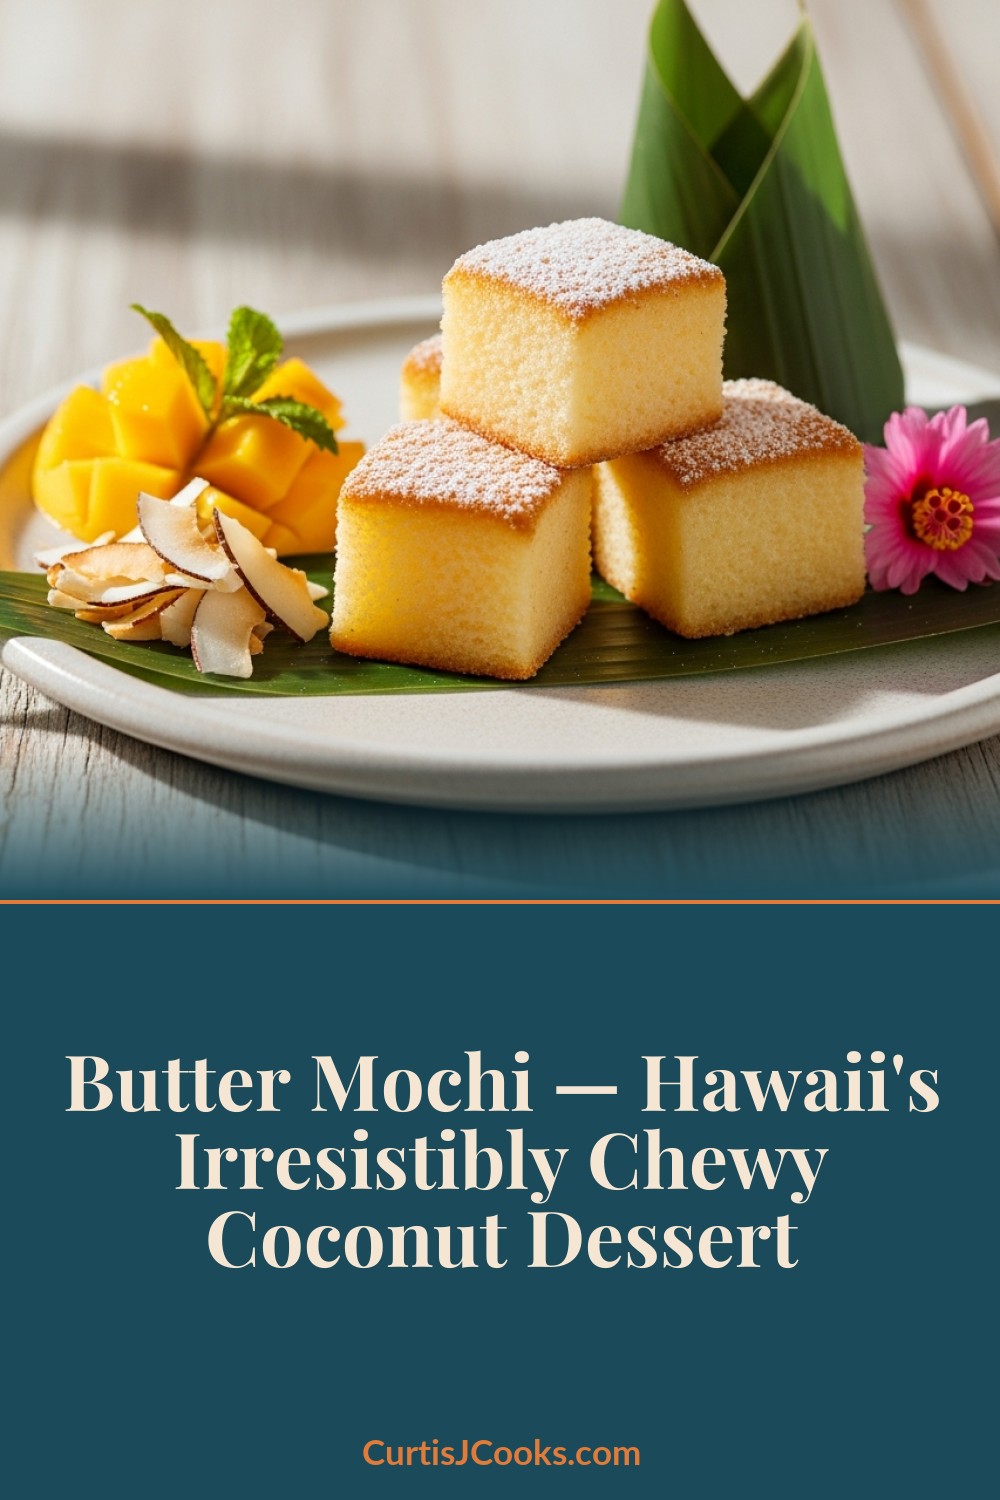
Traditional Japanese mochi is made from pounded sticky rice — it’s dense, stretchy, and almost bouncy. Butter mochi is a Hawaiian creation that takes mochiko (sweet rice flour) and combines it with butter, coconut milk, and eggs to create something completely different. It’s baked, not steamed or pounded. The texture is chewy but yielding, with a slight give that traditional mochi doesn’t have.
Free: Hawaiian Cooking Starter Kit
Get 5 essential island recipes + a printable pantry checklist — everything you need to start cooking Hawaiian at home.
No spam, ever. Unsubscribe anytime.
The genius is in the combination. Mochiko provides that characteristic chew. Coconut milk adds moisture and a subtle tropical sweetness. Butter gives richness and helps create that golden-brown top that contrasts with the soft interior. The result is a dessert that’s uniquely Hawaiian — it came out of the islands’ multicultural food scene, combining Japanese ingredients with Western baking techniques and tropical flavors.
You’ll find butter mochi at every potluck, bake sale, and family gathering in Hawaii. It’s the dessert that disappears first, and once you nail the texture, you’ll understand why.
The Secret to Perfect Butter Mochi Recipe Texture
The texture comes down to three things: the right mochiko, proper mixing, and careful baking. Mochiko is finely milled sweet rice flour — it’s what gives butter mochi its chew. Not all sweet rice flour is the same. You want Mochiko brand or Koda Farms Blue Star. The grind matters. Too coarse and your texture will be grainy. Too fine and it won’t have enough structure.
Coconut milk is the second key. Full-fat only. Lite coconut milk doesn’t have enough fat to keep the mochi tender, and you’ll end up with something dry and crumbly. The fat content in full-fat coconut milk is what keeps butter mochi moist and gives it that subtle coconut flavor that doesn’t overpower but definitely registers. I’ve tried this recipe with coconut cream (too rich, texture gets greasy) and lite coconut milk (too dry, loses the chew). Full-fat is the only way.
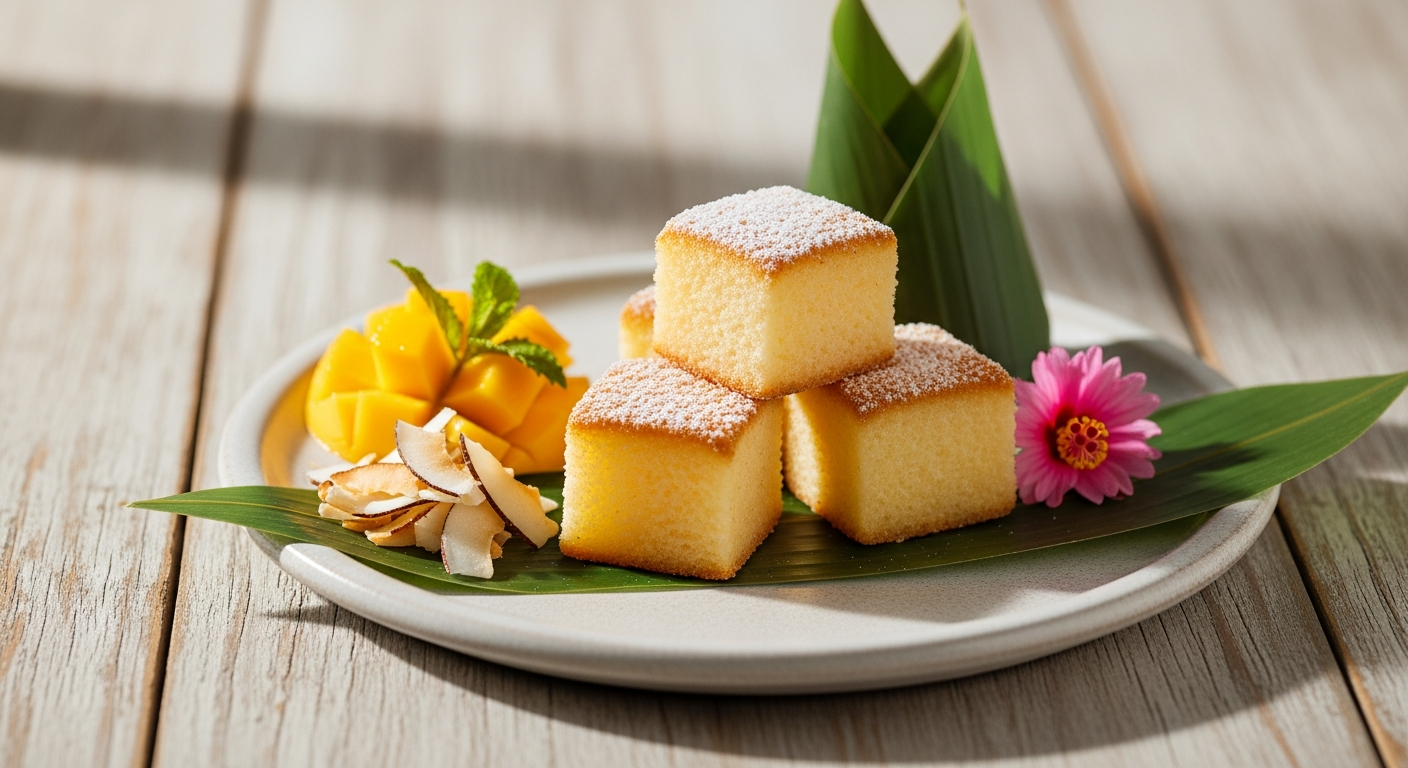
Butter adds richness and helps with browning. When butter mochi bakes, the top caramelizes slightly while the interior stays soft. That contrast — the golden, slightly crispy top against the yielding, chewy center — is what makes butter mochi special. Melted butter incorporates evenly into the batter. Room temperature butter creates pockets. You want even distribution.
The mixing technique matters more than you’d think. You need to mix thoroughly — the batter should be completely smooth with no lumps of mochiko. But you can’t overmix. Mochiko doesn’t have gluten, so you’re not worried about developing toughness like with wheat flour. What you’re worried about is incorporating too much air, which creates a spongey texture instead of that dense, satisfying chew. Mix until smooth, then stop.
The Ingredients You’ll Need for Butter Mochi
This is a short ingredient list, which means every single item matters. The quality of your mochiko directly affects your texture. The type of coconut milk determines whether your butter mochi stays moist or dries out. Get these right and the recipe works. Substitute or skip ingredients and it won’t. You can find mochiko at most Asian grocery stores or online — it’s worth seeking out the right brand rather than substituting with whatever sweet rice flour you find first. For mainland cooks, The Essential Hawaiian Pantry guide covers where to source mochiko and other Hawaiian ingredients.
- 1 box (16 oz) mochiko sweet rice flour (Mochiko brand or Koda Farms Blue Star)
- 2 cups granulated sugar
- 1 can (13.5 oz) full-fat coconut milk (not lite, not coconut cream)
- 1 cup whole milk
- 4 large eggs
- 1 stick (1/2 cup) unsalted butter, melted and slightly cooled
- 2 teaspoons baking powder
- 1 teaspoon vanilla extract
- 1/4 teaspoon salt
How to Make Butter Mochi
The key to perfect butter mochi is giving the batter time to rest before baking. Mochiko needs to hydrate fully — if you pour it into the pan immediately after mixing, you’ll get an uneven texture with some parts gummy and others grainy. Five minutes makes all the difference. The baking temperature matters too. Too hot and the edges set before the center cooks through. Too low and you won’t get that golden-brown top. 350°F is the sweet spot for most ovens, though if yours runs hot, drop to 325°F and add 10 minutes to the baking time.
Prep Time: 15 minutes | Cook Time: 1 hour | Total Time: 1 hour 15 minutes
Serves: 16
- Preheat your oven to 350°F. Grease a 9×13-inch baking pan with butter or non-stick spray, then line with parchment paper for easy removal.
- In a large mixing bowl, whisk together the mochiko, sugar, baking powder, and salt until completely combined with no lumps.
- In a separate bowl, whisk together the coconut milk, whole milk, eggs, melted butter, and vanilla extract until smooth.
- Pour the wet ingredients into the dry ingredients. Whisk until the batter is completely smooth with no lumps of mochiko visible — this takes about 2 minutes of steady whisking. The batter will be thin and pourable, similar to pancake batter.
- Let the batter rest for 5 minutes. You’ll notice it thickens slightly as the mochiko hydrates.
- Pour the batter into your prepared pan. Tap the pan firmly on the counter 3-4 times to release any air bubbles trapped in the batter.
- Bake for 55-65 minutes. The top should be golden brown and the edges should be pulling away from the sides of the pan. The center will still jiggle slightly when you shake the pan — this is what you want. It will set as it cools.
- Let the butter mochi cool completely in the pan — at least 2 hours, preferably overnight. It continues to set as it cools, and cutting it while warm will result in a sticky mess.
- Once completely cool, lift the butter mochi out using the parchment paper and cut into squares with a sharp knife. Wipe the knife clean between cuts for neat edges.
Why Your Butter Mochi Might Not Be Coming Out Right
The most common problem is texture — butter mochi that’s either too dense and gummy or too dry and crumbly. If your butter mochi is gummy and undercooked in the center, you either underbaked it or your oven temperature is off. Butter mochi needs that full hour-plus baking time. The center should still jiggle when you take it out, but the edges should be set and pulling away from the pan. If you’re consistently underbaking, get an oven thermometer — many home ovens run 25 degrees cooler than the dial indicates.
If your butter mochi is dry and crumbly, you either used lite coconut milk or overbaked it. Full-fat coconut milk is non-negotiable. Lite doesn’t have enough fat to keep the texture tender. Overbaking drives out moisture and makes the texture tough. Watch for the golden-brown top and edges pulling away — once you see those signs, it’s done even if the center still jiggles.
If your butter mochi won’t set and stays gummy even after cooling completely, you either undermixed the batter (mochiko didn’t fully incorporate) or didn’t let it rest before baking. The five-minute rest gives the mochiko time to hydrate. Without it, you get pockets of dry flour that never fully integrate.
If your top isn’t browning, your oven temperature is too low or you’re baking on too low a rack. Butter mochi needs direct heat from above to develop that golden crust. Bake on the center rack, and if your oven runs cool, bump the temperature to 375°F.
How to Store Butter Mochi (And Why It’s Better the Next Day)
Butter mochi is one of those rare desserts that actually improves after sitting. Fresh from the oven, it’s good. The next day, it’s perfect. The texture settles, the coconut flavor deepens, and that contrast between the golden top and chewy interior becomes even more pronounced. Store butter mochi at room temperature, covered loosely with plastic wrap or in an airtight container. It will keep for 3-4 days, though it rarely lasts that long.
Don’t refrigerate butter mochi. The cold firms up the texture and makes it dense and hard to chew. Room temperature is where it shines — soft, yielding, with just enough resistance to feel substantial. If you absolutely must refrigerate (hot, humid climate with no AC), bring it back to room temperature before serving. Thirty minutes on the counter makes a huge difference.
You can freeze butter mochi for up to 2 months. Cut it into squares, wrap each piece individually in plastic wrap, then store in a freezer bag. Thaw at room temperature for an hour before eating. The texture holds up surprisingly well — better than most baked goods.
Explore More Hawaiian Desserts
Butter mochi is just one way coconut shows up in Hawaiian desserts. Haupia is the other essential coconut dessert — silky, set coconut pudding that’s a luau staple. Chocolate Haupia Pie layers chocolate and coconut for Hawaii’s most famous pie. Lilikoi Bars bring tropical passion fruit into a bar-cookie format similar to butter mochi. And if you want something completely different, Malasadas are Hawaii’s Portuguese-influenced fried donuts — crispy outside, soft inside, rolled in sugar while still warm.