Easy Homemade Vegan Lasagna Recipe | Plant-Based Comfort
Master the art of making fresh pasta at home with our simple homemade pasta recipe. Learn authentic Italian techniques and create restaurant-quality noodles from scratch in your kitchen
Explore the World of Flavors and Recipes
Master the art of making fresh pasta at home with our simple homemade pasta recipe. Learn authentic Italian techniques and create restaurant-quality noodles from scratch in your kitchen
Master the art of making authentic New York pizza at home with our detailed recipe. Learn the secrets of perfectly thin crust, zesty sauce, and melty cheese that define a true new york pizza recipe
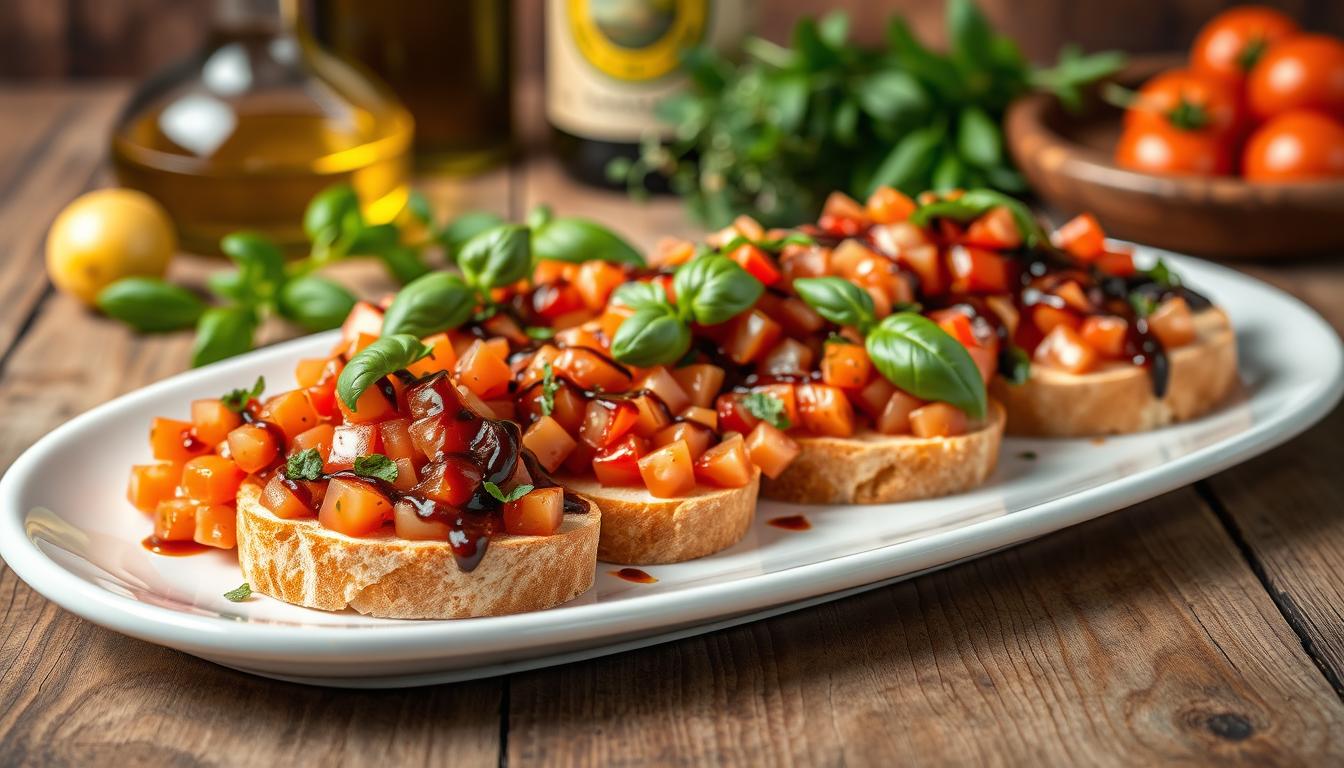
Bruschetta is a favorite Italian appetizer loved by many. It started in the 15th century. This dish has toasted bread topped with fresh tomatoes, garlic, and basil. Saying “bruschetta” is like saying “broos-ke-ta.”
The word comes from “bruscare,” which means “to toast.” It’s easy to make and great for summer parties. You can serve it alone or with other dishes.
Bruschetta is a favorite Italian dish loved by many. It started in ancient Rome and has grown into a summer classic. It’s made with grilled or toasted bread, fresh tomatoes, basil, and garlic.
In ancient Rome, olive growers tasted their oil on bread. This simple act turned into a beloved tradition. Over time, bruschetta became a staple in Italy, with each region adding its own twist.
While the classic tomato version is most loved, bruschetta can be many things. People have added roasted veggies, beans, meats, and cheeses. This shows how versatile and delicious this Italian dish can be.
“Bruschetta is a simple yet delightful way to celebrate the vibrant flavors of Italian cuisine, transporting you to the sun-drenched piazzas of Italy with every bite.”
To make the perfect bruschetta, you need a few key tools. Start with a sharp bruschetta ingredients and a sturdy cutting board. These help you chop fresh tomatoes, garlic, and basil for the flavor.
A good cutting board and sharp knife are crucial for bruschetta. The cutting board gives you a stable place to chop. A sharp knife makes sure your cuts are clean and even.
To toast the bread, you’ll need an oven or grill. Traditional Italian recipes often use a brustolina grill. But, a regular oven or grill will also give you that crunchy base.
Finally, a beautiful serving platter is key for presentation. Choose a rustic wooden board or a sleek ceramic dish. The right platter makes your bruschetta stand out.
Tool | Purpose |
---|---|
Cutting Board | Provides a stable surface for chopping bruschetta ingredients |
Chef’s Knife | Allows for precise, even cuts of the tomatoes, garlic, and basil |
Oven or Grill | Toasts the bread for the perfect crisp, crunchy base |
Serving Platter | Showcases the finished bruschetta in an attractive and appetizing way |
To make the perfect classic tomato bruschetta, focus on using top-notch ingredients. You’ll need ripe, juicy tomatoes, fragrant basil leaves, and pungent garlic. Don’t forget the richness of extra-virgin olive oil and the tang of balsamic vinegar. Adjust the amounts to your liking, but keep the essence of a true bruschetta.
The tomatoes are the main attraction. Choose medium-ripe, vine-ripened tomatoes in season. Cherry, heirloom, or plum tomatoes are great choices. Their sweetness and juiciness make the dish pop.
Add fresh basil leaves and minced garlic to elevate your bruschetta. The basil and garlic blend beautifully with the tomatoes. Use big, fat garlic cloves for the best flavor.
A classic bruschetta needs high-quality extra-virgin olive oil and balsamic vinegar or glaze. The olive oil adds a rich, fruity taste. The balsamic vinegar brings a tangy-sweet flavor that boosts the dish.
Quality ingredients are key to a delicious bruschetta. Use the freshest tomatoes, basil, and garlic. Pair them with the finest olive oil and balsamic vinegar. You’ll create an Italian appetizer that will wow everyone.
Creating a true Italian appetizer like bruschetta starts with great bread. The right bread makes your bruschetta recipe stand out. It adds a nice contrast of textures and tastes. Let’s look at how to pick and prepare the perfect bread for your bruschetta.
For bruschetta, choose a rustic, crusty loaf like ciabatta, sourdough, or filone. These breads are sturdy and won’t get soggy. Stay away from soft, fluffy garlic bread or delicate slices. They can’t handle the bruschetta toppings well.
The best bruschetta bread is crisp on the outside and chewy inside. Aim for a golden-brown toast that’s still a bit firm. Rub the warm, toasted bread with a halved garlic clove for extra flavor before adding toppings.
Choosing the right bread and toasting it right gives your bruschetta a solid base. This foundation lets your guests enjoy the mix of textures and tastes that make this Italian appetizer so appealing.
Making the perfect easy bruschetta is about mixing flavors and textures. Let’s go through the steps to make this classic Italian appetizer. It’s sure to wow your guests.
Begin by cutting up fresh, ripe tomatoes. Roma tomatoes are great because they’re firm and have the right acidity. You’ll need about 1 1/2 pounds of diced tomatoes, which is 6-7 medium-sized ones.
Gently mix the diced tomatoes with minced garlic, fresh basil, olive oil, and sea salt. Let it sit for at least 15 minutes, or up to an hour. This lets the flavors blend well.
For the best bruschetta base, pick a crusty Italian bread like a baguette or ciabatta. Cut the bread into 1/2-inch thick slices and lay them on a baking sheet. Heat your oven to 415°F (215°C) and toast the bread for 5-7 minutes, until it’s golden.
Watch it closely to avoid burning.
After toasting, rub each bread slice with garlic for a garlic flavor. Then, put the marinated tomato topping on the bread, but don’t overdo it. You can also add a bit of balsamic vinegar or glaze for extra flavor. Serve the easy bruschetta right away for the best taste and texture.
By following these easy steps, you’ll make a delicious Italian appetizer that will impress everyone. The secret is using top-notch, fresh ingredients and letting the flavors mix well.
When making the perfect bruschetta recipe, avoid a few common mistakes. Too many toppings can make it hard to eat and soggy. Also, using old bread ruins the crunchy texture that’s key to this Italian cuisine classic.
Using fresh tomatoes and herbs is crucial for a great bruschetta. Skipping these can make your dish taste flat and lack the fresh taste that bruschetta is known for.
By avoiding these mistakes and using quality ingredients, you’ll make a bruschetta that will wow any Italian cuisine lover.
“The key to a perfect bruschetta is striking the right balance of flavors and textures – crisp bread, juicy tomatoes, and fragrant herbs.”
Bruschetta, the beloved Italian appetizer, is not just about tomatoes and basil. It’s a canvas for many flavors and ingredients. Let’s dive into some creative bruschetta topping ideas to spice up your summer gatherings and add an Italian twist to your menu.
Try sautéed mushrooms and creamy goat cheese for a rich twist. The earthy mushrooms and tangy goat cheese make a perfect pair. They offer a delightful mix of flavors.
Give your bruschetta a modern, Mediterranean vibe with mashed avocado and crumbled feta cheese. This combo is fresh, vibrant, and will wow your guests.
For a classic Italian taste, layer prosciutto and sweet melon on your bruschetta. The salty prosciutto and juicy melon blend beautifully, capturing the essence of summer.
Bruschetta toppings are endless, from mushrooms to avocado, and from prosciutto to melon. These ideas show how versatile this Italian appetizer is, making it ideal for summer entertaining. Start trying out these bruschetta variations to amaze your guests and excite their taste buds.
Bruschetta, the classic Italian appetizer, is perfect for many occasions. It’s great for casual summer gatherings or fancy dinner parties. This dish offers endless ways to present and pair it.
The fresh tastes of bruschetta go well with light, crisp white wines. Try Pinot Grigio or Sauvignon Blanc. For something heartier, a light red wine like Chianti works well.
Display your bruschetta on a rustic wooden board or a sleek white platter. It looks great. You can also serve different bruschetta recipes together. This shows off the variety of flavors and colors.
Top it with fresh basil leaves or a drizzle of balsamic glaze for a fancy look. Whether it’s a casual get-together or a formal dinner, bruschetta will wow your guests. Its versatility and lively flavors make it ideal for any summer appetizer.
“Bruschetta is the perfect balance of flavors – the crunch of the toasted bread, the juiciness of the tomatoes, and the freshness of the basil and garlic. It’s an appetizer that everyone loves!”
Making your own bruschetta recipe is a joy. But what about leftovers? With a few easy tips, you can keep the taste of your Italian appetizer fresh for days.
For the best taste, store each part of your bruschetta separately. Put the tomato mix in an airtight container in the fridge for up to 5 days. Store the toasted bread in a sealed bag or container at room temperature for 1-2 days.
Don’t freeze the bruschetta once it’s assembled. The fresh tomatoes won’t thaw well. Instead, keep the tomato mix and bread apart. You can use the leftover tomato mix as pasta sauce or salad topping.
For the best taste, eat your bruschetta within 1-2 days. This way, you’ll enjoy the freshest flavors.
Bruschetta is a tasty Italian appetizer from the 15th century. It’s toasted bread topped with fresh ingredients like tomatoes, garlic, and basil.
Bruschetta’s roots go back to Ancient Rome. Olive growers would taste their oil on bread. Over time, it became a beloved Italian dish.
Classic bruschetta needs crusty bread, ripe tomatoes, fresh basil, garlic, and extra-virgin olive oil.
Bruschetta can have many toppings. You can use vegetables, beans, cured meats, and cheeses. It’s a versatile appetizer.
You’ll need a sharp knife and cutting board for chopping. An oven or grill for toasting bread. And a platter for serving.
Cherry, heirloom, or plum tomatoes are great for bruschetta. The quality of the tomatoes really matters.
Choose sturdy bread like ciabatta or baguette. Cut it into 1/2-inch slices. Toast until golden, using a grill, broiler, or toaster oven.
Mix diced tomatoes, garlic, basil, olive oil, and salt in a bowl. Let it marinate for 15-60 minutes. Then, spoon it on toasted bread. You can drizzle with balsamic vinegar or glaze.
Don’t overload the bread, use stale bread, or skip fresh ingredients. These mistakes can make the bruschetta soggy or unsatisfying.
Try sautéed mushrooms with goat cheese, mashed avocado with feta, or prosciutto with melon. These are tasty alternatives to the classic tomato topping.
Serve bruschetta with light wines. Present it on a wooden board or white platter. Store the tomato mixture in the fridge for 1-2 days. Keep the toasted bread at room temperature.
Discover how to make authentic Italian cannoli at home with our easy-to-follow cannoli recipe. Learn to create crispy shells and creamy ricotta filling for this classic treat
Master the art of making authentic Italian risotto with this foolproof risotto recipe. Learn essential techniques for achieving perfectly creamy, al dente rice in under 30 minutes
Imagine the smell of freshly baked Italian bread in your kitchen. The crunchy crust and soft inside are irresistible. This easy homemade Italian bread recipe makes a delicious, authentic rustic Italian loaf. It uses just four ingredients and a mixer, making it easy to make.
The recipe’s success comes from Tipo 00 or all-purpose flour. It gives the bread its chewy texture. Yeast, sugar, and salt balance the flavors, making the bread comforting and complex. Plus, it doesn’t need kneading, making it fun for beginners.
This bread is great with stews, pasta dishes, or just olive oil and balsamic vinegar. It’s a must-have in your kitchen. You can bake it 2-3 times a week for a fresh loaf every time.
Italian bread has a rich history, deeply rooted in the country’s culinary traditions. From the famous pane dei Castelli Romani to the loaves enjoyed by families, it’s more than food. It’s a cultural symbol, carrying the tastes and traditions of the past.
The history of Italian bread starts with the ancient Romans. They made simple, nourishing loaves. Over time, different regions developed their own breads, each with its own taste and baking style.
From the crusty pane di Matera in the south to the soft focaccia in the north, bread is a source of pride. It shows the diversity and richness of Italian culture.
Italian bread is more than a side dish. It’s a key part of Italian food culture. It’s used in bruschetta, panzanella salad, and enjoyed on its own. This versatile bread can make any dish better.
Italian bread shows the country’s cultural diversity. Each region and family has its own bread recipe and baking traditions. From the long baguette-style loaves in Piedmont to the flaky pane Toscano in Tuscany, the variety is stunning.
“Bread is the foundation of Italian cuisine, the heart and soul of our culinary tradition.”
– Mario Batali, renowned Italian chef
Making authentic Italian bread begins with choosing the right ingredients. You’ll need italian bread flour, yeast, water, and a bit of salt. The quality and mix of these ingredients are key to the bread’s texture, taste, and how it rises.
While all-purpose flour works, Tipo 00 flour is the top choice for Italian bread. It’s finely milled and has low gluten, making the bread light and airy. Bread flour, with more protein, can make a loaf that’s heartier and more substantial.
Getting the yeast to activate is key for the dough to rise and develop flavor. Use active dry italian bread starters or instant yeast. First, proof them in warm water with a bit of sugar before mixing with flour.
The water in the dough is very important. Use filtered or spring water for the best results. The minerals in the water can affect the dough’s moisture and the crust’s texture. You might need to adjust the water amount based on the flour and the environment.
Ingredient | Quantity |
---|---|
Italian Bread Flour | 4 1/2 cups |
Active Dry Yeast | 1 tablespoon |
Warm Water | 1 cup |
Olive Oil | 2 tablespoons |
Salt | 1 tablespoon |
“The key to exceptional Italian bread lies in the perfect balance of quality ingredients and precise technique.”
Making homemade italian bread from scratch might seem hard. But, with the right steps, it’s easy and rewarding. Follow these simple steps to make a delicious and authentic loaf every time.
Start by activating the yeast. In a large bowl, mix warm water (around 105-110°F), active dry yeast, and a bit of sugar. Wait 5-10 minutes for it to get frothy, showing the yeast is alive.
Then, add flour, olive oil, and a bit of salt to the yeast mixture. Use a wooden spoon or your hands to mix until it’s shaggy. Turn the dough onto a floured surface and knead for 10 minutes. This makes the dough smooth and elastic.
Put the kneaded dough in a greased bowl, cover it, and let it rise in a warm, draft-free spot for about 1 hour. It should double in size. This first rise is key for flavor and structure.
After rising, gently punch down the dough to get rid of air bubbles. Divide it into two equal pieces and shape each into a long, narrow loaf. Place the loaves on a parchment-lined baking sheet, cover them, and let them rise for another 30 minutes.
With these steps, you’re on your way to baking delicious homemade italian bread. The key is patience and attention to detail. So, take your time and enjoy the process. Happy baking!
Learning to bake Italian bread at home is all about mastering the right techniques. From preheating the oven to picking the best baking vessel, each step is vital. These steps help you achieve a crispy crust and a soft, airy inside. Here are the top baking tips to make your italian bread a dream come true.
Heat your oven to a hot 400°F (200°C). This high temperature is essential for a perfect crust and even baking. Make sure the oven is fully preheated before putting in your dough.
For the ultimate Italian bread, consider a baking stone. These stones mimic a wood-fired oven, giving a crispy crust. But, a baking sheet works great too, especially if it’s preheated with the oven.
Bake your italian bread for about 30 minutes. The crust should be golden brown and the inside should be 195°F (91°C). If the crust browns too fast, lower the oven to 375°F (190°C) for the rest of the time.
“By far one of the best and easiest bread recipes I have come across!!”
Perfect italian bread baking is all about watching temperature and timing. With practice and these tips, you’ll soon be making loaves like a pro.
Making the perfect italian bread recipe needs practice. But, avoiding common mistakes can greatly improve your results. From over-kneading to skipping the rising time, let’s look at the main errors to avoid. This way, you can bake Italian bread that’s always delicious.
It’s tempting to knead the dough too much. But, doing so can make the bread tough and chewy. Aim for about 12 minutes of kneading, either with a stand mixer or by hand. Stop when the dough feels smooth and elastic.
The perfect italian bread dough is slightly moist but not too sticky. If it feels wrong, adjust the water and flour ratio. Use a spoon to measure flour, avoiding scooping too much.
Don’t rush the rising times. The first rise should last about 1.5 hours, until the dough doubles. After shaping, the second rise should be 60 minutes to avoid collapse. Patience is crucial for a light, airy crumb.
Remember these tips to bake the perfect italian bread recipe every time. With practice and attention to detail, your homemade bread will impress everyone.
“The secret to making great Italian bread is in the details. Pay close attention to the dough and give it the time it needs to rise and develop flavor.”
Adding a few simple ingredients can make your homemade Italian bread special. Herbs, spices, garlic, cheese, olives, and nuts can turn a basic loaf into a delicious olive italian bread or artisan italian bread. These additions will make your bread a treat for the senses.
Italian bakers love using herbs like rosemary, oregano, and basil. These herbs add deep, earthy flavors to the bread. Mix them into the dough for even flavor. Or, brush the dough with olive oil and sprinkle on spices like fennel seeds or thyme for a tasty crust.
Adding minced garlic and shredded cheese, like Parmesan, makes the bread savory. The cheese melts, creating cheesy pockets. The garlic adds a warm, pungent aroma to the whole loaf.
Chopped olives or toasted nuts give your olive italian bread a Mediterranean twist. Olives add a salty flavor that pairs well with the bread’s texture. Walnuts, almonds, or pine nuts add crunch and nutty taste.
Try different flavors to make your Italian bread stand out. You can create unique and tasty breads that will wow your loved ones. The options are endless for enhancing your olive italian bread or artisan italian bread.
Keeping your homemade Italian bread fresh and flavorful is key. Follow these tips to store and freeze your bread perfectly.
For short-term storage, keep your Italian bread in a paper bag or bread box at room temperature. This keeps the crust crisp and the inside moist. Your bread will stay tasty for 2-3 days.
To warm up your frozen Italian bread, reheat it in a 350°F oven for 10-15 minutes. For slices, toast them until crispy. Don’t refreeze, as it can ruin the bread’s texture and taste.
By using these storage and freezing methods, your homemade Italian bread will stay fresh and delicious. Enjoy your baking for days to come.
Enjoying a rustic Italian loaf opens up endless possibilities. It’s perfect for a light snack or a big meal. This bread can make your mealtime special in many ways.
Dip slices of Italian bread in extra-virgin olive oil and balsamic vinegar. The olive oil’s rich flavor and the balsamic’s tangy sweetness are a perfect match. They highlight the bread’s rustic texture beautifully.
Use Italian bread to make amazing sandwiches. Try classic choices like porchetta or grilled cheese. Or, be creative with prosciutto, melon, and balsamic glaze. The bread’s sturdy yet soft crumb is ideal for your creations.
No Italian meal is complete without Italian bread. Use it in dishes like panzanella, a Tuscan salad with bread, tomatoes, and dressing. Or, serve it with pasta dishes like creamy lemon chicken or sausage and peppers. It’s great for soaking up sauces.
Italian bread is incredibly versatile. It’s great for a quick snack or to enhance your favorite Italian dishes. This rustic loaf adds authentic flavor and comfort to your meals.
Learning to make homemade Italian bread is a fun journey. It lets you make tasty, fresh bread in your kitchen. It doesn’t matter if you’re new or have been baking for years. The most important thing is to be patient, pay attention to details, and be open to trying new things.
If you’re new to bread making, don’t worry. Start with easy recipes like classic Italian bread. Focus on learning the basic steps. With each loaf, you’ll get better and understand dough better. Remember, even if your loaves aren’t perfect, they can still taste great.
As you get better at making Italian bread, remember these tips. Watch how the dough looks and feels. Change the ingredients to fit your taste. Try different flours, herbs, and spices to add flavor. Also, make sure your oven is at the right temperature and bake for the right time to get the best crust and inside.
We want to see your homemade Italian bread creations. Share your photos and recipes on social media with #HomemadeItalianBread. Connect with other bakers who love making artisanal breads. We can all learn from each other and grow our love for Italian bread baking.
This Italian bread recipe is simple and uses basic ingredients. It makes a delicious loaf with a crispy crust and soft inside. It also teaches two ways to add sugar and highlights the joy of making bread.
Italian bread has a long history and is key to Italian food. Pane dei Castelli Romani, from the Roman Castles area, is famous. It’s used in dishes like bruschetta and panzanella. Each family in Rome has its own bread recipe.
Italian bread needs flour (Tipo 00 or all-purpose), water, yeast, salt, and sometimes sugar. Tipo 00 flour is the best for Italian bread. The quality of water and yeast activation are important. Olive oil can add flavor and texture.
The recipe shows two methods: “zero effort” and “stretch-and-fold”. The zero-effort method is great for busy days. The stretch-and-fold method makes a taller loaf with a better crumb.
To make perfect Italian bread, preheat the oven to 375°F (190°C). Use a baking stone for better results. Bake for about 30 minutes until it sounds hollow. Some recipes suggest using a Dutch oven for a traditional oven feel.
Avoid forgetting to add salt, which is key for flavor. Don’t over-knead the dough to avoid tough bread. The dough should be moist but not sticky, and allow enough rising time.
Add herbs, spices, garlic, cheese, olives, or nuts to enhance flavor. Brushing with olive oil before baking makes the crust crunchier. Sprinkling sea salt or sesame seeds adds texture and taste.
Store Italian bread at room temperature in a paper bag or bread box. Freeze for longer storage and thaw at room temperature. Slightly stale bread can be toasted or used in recipes like panzanella.
Italian bread is versatile. Enjoy it with olive oil and balsamic vinegar, or use it for bruschetta. It’s great in sandwiches like porchetta or grilled cheese. Use it for dipping in sauces or soups, or as a base for dishes like panzanella. Serve it with pasta or as a quick snack by rubbing it with garlic and fresh tomato.
Discover the secrets of the perfect traditional lasagna recipe that combines rich ricotta, homemade béchamel, and authentic noodles for a classic taste.
Satisfy your craving with our guide to the best pasta dishes, including classics like lasagna, penne alla vodka, and more favorites!
Imagine walking through Milan’s busy streets, where the smell of saffron risotto fills the air. This authentic Italian risotto recipe honors the classic Milanese cuisine. It shows the Italian tradition’s love for simplicity and quality.
Creating this dish takes about 30 minutes of active time. It will impress your guests with its creamy texture and rich flavors. Saffron, known as the most expensive spice, gives it a golden color and a unique taste.
True to Milan’s cooking style, use Carnaroli or Arborio rice. Add depth with homemade low sodium chicken stock. Finish it with a sprinkle of Parmigiano-Reggiano.
Welcome to the world of Italian cuisine, where risotto is a heartwarming dish. It’s a classic from Milan and loved worldwide. Its creamy texture is thanks to special cooking methods, showing Italy’s culinary skill.
Risotto is a rice dish from northern Italy, cooked until creamy. It uses broth from meat, fish, or veggies. It also includes butter, onion, white wine, and parmesan cheese.
Saffron adds a vibrant color to it. The rice absorbs flavors slowly as liquid is added. Arborio rice makes it creamy.
Risotto comes from Northern Italy, especially Lombardy. Rice was introduced by Arabs in the 13th century. It became popular in the Middle Ages.
In 1829, Risotto alla Milanese was first written down. It became the saffron dish we love today. Over time, risotto has kept its roots while trying new things.
Learning about risotto is key to understanding Italian cuisine. You’ll find out about its history and how it’s made. It’s a dish that shows Italy’s culinary tradition, whether it’s classic or new.
Making the perfect Italian risotto is like a special journey. It begins with picking the best high-quality ingredients. Each part, from the rice to the broth and herbs, is crucial for a dish that’s both cozy and creamy.
The base of any real risotto is the rice. Arborio rice is a top pick because it soaks up liquids and flavors well. This makes it sticky yet soft, just like a great risotto should be. It’s also high in starch, which makes it creamy.
Other good options are Carnaroli and Vialone Nano. They have slightly different textures and flavors.
The broth is also key. Using homemade chicken stock makes the risotto taste better. Homemade stock is richer and more flavorful than store-bought, making the rice taste amazing with every stir. Steeping saffron threads in the broth adds a special color and smell.
To finish the dish, add fresh flat-leaf parsley and other herbs. They bring a fresh taste that balances the richness of the risotto. Parsley’s clean flavor is a nice contrast to the creamy rice. A little saffron adds a beautiful golden color and a fancy flavor.
Ingredient | Quantity | Role in Risotto |
---|---|---|
Arborio rice | 4 cups | Main starch, creates creaminess |
Homemade chicken stock | 2.5 liters | Flavor base, cooked into rice |
Fresh flat-leaf parsley | 1 handful, chopped | Adds freshness and color |
Saffron threads | A pinch | Imparts color and exotic flavor |
These high-quality ingredients come together to make more than a meal. They create an experience. Italian cooking is all about celebrating the best ingredients, so choose them carefully and treat them with respect.
Learning to make a perfect Italian risotto is more than just following steps. It’s about improving your cooking skills to get the right texture, flavor, and creaminess. Once you master it, making risotto will become second nature!
The key to creamy arborio rice is the stirring technique. You need to stir constantly and gently. This releases the starches, making the rice smooth and creamy.
Stirring also prevents the rice from sticking to the pan. It ensures even cooking, which is key for the perfect ‘al dente’ texture. Your patience will be rewarded with each creamy spoonful!
Adding liquid slowly is crucial in an Italian risotto recipe. You add hot broth bit by bit, letting it absorb before adding more. This method ensures even heat and perfectly cooked rice.
Using about ¾-cup increments of hot salted water helps the rice absorb flavors deeply and evenly.
Knowing when your risotto is ready is crucial. It should be creamy and have a perfect ‘al dente’ texture. It usually takes about 20 minutes to get it right.
Remember to taste and adjust the seasoning as needed. The dish should flow like lava from your spoon.
For more detailed guidance on finding the ideal balance in your risotto, check out this classic technique. It’s a handy reference that reinforces the traditional steps you should explore to elevate your risotto-making game.
Ingredient | Quantity Needed | Type of Risotto Recipe |
---|---|---|
Arborio Rice | 2 cups | Classic |
Extra-virgin Olive Oil | 6 Tbsp. | All Varieties |
Dry White Wine | 1 cup | Most Types |
Unsalted Butter | 5 Tbsp. | Classic, Mushroom |
Parmesan Cheese | 1¼ cups | Classic, Lemon |
Once you’ve mastered these techniques, making a spectacular Italian risotto will become a joyful journey. Each batch is a chance to refine your technique and add your personal twist. So, grab your spoon, and let’s start stirring our way to risotto perfection!
Exploring Italian risotto variations is a journey filled with choices. Each dish, like Risotto alla Milanese, mushroom risotto, or seafood risotto, offers a unique taste. They are a gateway to authentic Italian cuisine, right in your home.
The Risotto alla Milanese is famous for its bright yellow color. This comes from saffron, a rare spice. It’s a feast for your taste and eyes.
The saffron is added to the broth, letting the rice soak up its flavors. The result is creamy, al dente, and full of flavor. It’s a true reflection of Milan’s culinary pride.
Mushroom risotto is perfect for those who love earthy tastes. You can use cremini, shiitake, or truffles. The secret is using the mushroom liquid for extra flavor.
This adds layers of umami and a velvety texture. A chicken broth reduction enhances the flavors, making it a masterpiece.
Seafood risotto is for those who love the sea. It’s made with prawns, mussels, and scallops. It’s a mix of fresh sea tastes.
Chefs might add squid ink for color and a briny hint. The creamy risotto highlights the seafood, making it luxurious and comforting.
Variation | Main Ingredients | Unique Aspect |
---|---|---|
Risotto alla Milanese | Saffron, Parmesan cheese, unsalted butter, chicken broth | Golden yellow color from saffron |
Mushroom Risotto | Various mushrooms, mushroom-soaking liquid, Arborio rice | Rich, earthy flavor enhanced by mushroom juice |
Seafood Risotto | Mixed seafood, possibly squid ink, parsley | Fresh seafood taste with an optional dramatic black hue |
Trying these Italian risotto variations brings Italy into your kitchen. It shows the dish’s versatility and excellence. Whether using saffron or mushroom broth, each version promises a great cooking and dining experience. It invites you to enjoy Italy’s rich culinary heritage.
Finding the perfect wine to go with an authentic Italian risotto recipe makes every meal special. It’s about mixing flavors and traditions in every bite. Knowing how to match the creamy risotto with the right wine can make a simple meal unforgettable.
Using white wine in cooking is common in many risottos. It adds a bright, acidic taste that brings out the dish’s natural flavors. But picking the right wine to serve with risotto is also important. It depends on the flavors and ingredients in the dish.
Choosing between red and white wine for risotto can change the taste. Red wine flavor profiles are often deeper and richer. They match well with meaty risottos. White wines, on the other hand, are crisp and light. They pair well with seafood or vegetable risottos.
For the best wine pairing, think about the risotto’s main flavors and the wine’s characteristics. Here’s a quick guide to help you find the perfect match:
For more detailed information on the perfect wine and risotto combinations, check out this insightful resource on how to pair wine with risotto.
The secret to great wine pairing with risotto is to enhance its flavors without overpowering it. Whether it’s a bubbly Franciacorta with a four-cheese risotto or a crisp Vermentino with seafood, the right wine can elevate your risotto from good to great.
Perfecting risotto is like conducting a symphony—it’s all about harmony and timing. With the right techniques, you can achieve that creamy consistency and authentic Italian flavor. Here, I’ll share some essential tips to elevate your risotto dishes.
Timing is key for a great risotto. Start by sautéing onions until they’re translucent, which takes about 6-8 minutes. Then, toast the rice with the onions for another 5 minutes. This step unlocks the starches for the risotto’s unique texture.
Next, add warm broth slowly, waiting 2-3 minutes between each addition. This ensures the rice absorbs the liquid well, creating a creamy consistency.
The path to creamy perfection requires attention to detail. After cooking the rice, use a method called mantecatura. Stir in cold butter and Parmigiano-Reggiano vigorously at the end. This process adds the final touch, making the risotto creamy yet fluid.
Several pitfalls can ruin your risotto. Avoid overcooking, which makes the rice mushy. Cook it for exactly 18 minutes for the perfect texture. Also, don’t under-stir, as it can lead to uneven cooking.
Risotto is best fresh, so eat it within two days. Use high-quality broth to capture that authentic Italian flavor.
Ingredient | Amount | Time |
---|---|---|
Chopped Onion | ½ Cup | 6–8 Minutes |
Dry Arborio Rice | Adjust for serving | 5 Minutes until translucent at edges |
Dry White Wine | 1 Cup | 2 Minutes until evaporated |
Chicken Stock | ¾ Cup Increments | 2–3 Minutes per increment absorption |
Unsalted Butter & Parmesan for Mantecatura | 5 Tbsp Butter & 1¼ Cups Parmesan | Until Creamy Consistency |
By following these techniques and avoiding common mistakes, you’ll master risotto. Dive into the richness of Italian cooking and enjoy each creamy, flavorful bite.
An authentic Italian dining experience is all about the risotto serving suggestions. These suggestions make the dish both flavorful and visually appealing. When you serve risotto, it’s more than just filling your belly. It’s about creating a moment that’s both beautiful and delicious. Let’s see how to serve this classic dish in a way that highlights its best qualities.
Elegant food presentation is essential to honor Italian culinary traditions. Imagine serving risotto in a pre-warmed, shallow bowl. The creamy texture spreads gently, and a sprinkle of parmesan melts into the risotto. Here’s a step-by-step guide to achieve that perfect presentation:
Complimentary flavors are key to a complete Italian dining experience. A well-chosen side dish can complement the risotto’s rich texture. It introduces freshness or crunch.
Risotto Type | Recommended Side Dish | Preparation Notes |
---|---|---|
Pesto Risotto | Fennel and Orange Salad | A crisp, refreshing salad that contrasts the richness of pesto. |
Parmesan Risotto | Roasted Asparagus | Lightly roasted with olive oil and sea salt; enhances the nutty flavor of Parmesan. |
Seafood Risotto | Garlic Spinach | Quick sauté with garlic provides a simple, clean flavor to balance seafood’s sweetness. |
Whether it’s for a special dinner or just to elevate your meal, these risotto serving suggestions will help you master Italian cuisine. The key to a great Italian dining experience is in the details. Use fine ingredients, adjust cooking times, and focus on presentation. Buon appetito!
Exploring vegetarian and vegan risotto recipes is a joy. These options are great for those who follow a plant-based diet for health or ethical reasons. They let everyone enjoy this classic dish without dairy.
To make a vegetarian or vegan risotto, use vegetable broth instead of animal-based broth. This change makes the dish vegetarian and adds new flavors. For creaminess, try soy, oat, or coconut milk. They make the risotto rich and creamy without dairy.
Vegetarian risotto offers endless possibilities with vegetables. Adding a variety of seasonal vegetables boosts nutrition and looks great. Try bell peppers, sweet peas, or asparagus for different tastes and textures.
Here’s what you need for a delicious vegan risotto:
Ingredient | Quantity | Notes |
---|---|---|
Arborio or Carnaroli rice | 250 g | Essential for creaminess |
Onions, finely diced | 1-2 | Adds sweetness |
Garlic, finely chopped | 4-6 cloves | Enhances flavor |
Vegan white wine | ½ cup (120 ml) | For deglazing |
Vegetable broth | 2 ½ cups (600 ml) | Substitute for chicken or beef broth |
Dairy-free cream | 1 cup (240 ml) | Soy, oat, or coconut |
Nutritional yeast or vegan parmesan | 3-4 tablespoons | Optional, for cheesy flavor |
Vegan feta | 3.5 oz (100 g) | Enhances texture and taste |
Try these alternatives in your next cooking project. Enjoy a delicious vegetarian risotto that’s animal-free. With each bite, celebrate your choice for a kinder, greener diet.
I love finding healthy Italian meals that everyone can enjoy. Risotto is a great example. It’s perfect for those looking for gluten-free or low-carb options.
Risotto is made with arborio rice, which is gluten-free. This makes it safe for people with gluten sensitivities or celiac disease. You don’t have to give up flavor or texture when you choose gluten-free Italian recipes.
For a gluten-free twist, try adding fresh veggies like asparagus, peas, or bell peppers. They add flavor and nutrients. Using gluten-free broth makes your dish safe for those with dietary restrictions.
For low-carb risotto, cauliflower rice is a great choice. It’s low in carbs but still creamy and filling. Cauliflower rice is also packed with vitamins C and K.
By making these changes, everyone can enjoy risotto. These recipes are not just for special diets. They’re for anyone who loves exploring new flavors in healthy Italian meals.
Ever wondered how to keep your leftover Italian risotto as creamy as the first time? Knowing how to store and reheat risotto is key. I’ll share tips to keep your risotto fresh and delicious.
Storing risotto right is crucial to keep its creamy texture. If not stored correctly, it can become starchy. Here’s what you need to do:
Risotto with seafood or meats should be eaten within 3 days to avoid bacterial growth or food poisoning.
Reheating risotto should aim to restore its creamy texture. Here are the best ways to do it:
Never reheat risotto or any cooked rice dish more than once to avoid food safety issues.
Want to make something new with leftover risotto? Try making arancini balls. Mix the risotto with an egg, shape into balls, and coat with breadcrumbs. They’re a tasty treat that showcases Italian cuisine.
Learning these simple storage and reheating tips can make your leftover risotto just as good as the first time. Enjoy!
Learning to make risotto is more than just a recipe. It’s diving into the heart of Italian cooking. We’ve seen how Arborio rice makes the dish creamy. And how stirring and patience turn it into a velvety sauce.
Getting the ‘al dente’ texture is key. It’s what makes a risotto truly special.
Mastering risotto is all about the details. Choosing the right rice and following the traditional cooking method are crucial. This includes stirring for 18-20 minutes and adding liquid slowly.
Adding fiber, vegetables, or lean proteins makes the dish healthier. It also boosts the flavors.
Mastering risotto is just the beginning. Italian cuisine offers a world of flavors to explore. From colorful antipasti to rich ragù, each dish has its own story.
As you cook and share, you realize food is more than just food. It’s about connection, culture, and love. So, keep exploring and enjoy every meal as a journey through Italian gastronomy.
Risotto is a creamy Italian rice dish. It’s made by stirring hot broth into arborio rice over low heat. This makes the rice rich and velvety. Classic Milanese cuisine often features Risotto alla Milanese, which is distinguished by the addition of saffron.
Risotto has been a part of Italian cooking since the Middle Ages. It’s especially popular in northern Italy. There, it’s known for its creamy, saffron-infused Risotto alla Milanese.
Arborio rice is the best for risotto because of its high starch content. This is what makes the dish creamy. It also absorbs flavors well from the broth and other ingredients.
The broth’s quality is very important. It adds flavor to the rice. A rich, homemade chicken or vegetable stock will make the dish richer than less flavorful options.
Yes, you can try different herbs and spices in your risotto. But, parsley and saffron are traditional. They give authentic flavors, especially in classic recipes like Risotto alla Milanese.
The secret is adding warm broth slowly and stirring constantly. This cooks the rice evenly. It releases starch, making the rice creamy yet still al dente, just like an authentic Italian risotto.
Yes, there are many other risotto variations. You can try mushroom risotto for earthy flavors or seafood risotto with a mix of shellfish and ocean delights.
Risotto alla Milanese goes well with medium-bodied red wines. They complement its creamy richness. A dry white wine, used in cooking, can also pair nicely. It brings out the dish’s complex flavors.
Start by sautéing onions and toasting the rice. Then, add the broth slowly, waiting until it’s almost absorbed before adding more. Avoid over- or under-cooking the rice. Remember to stir vigorously during the mantecatura step.
Serve risotto immediately in pre-warmed shallow bowls. This highlights its creaminess. You can add a side salad or serve it with dishes like osso bucco. Timing is key for the best temperature and texture.
For a plant-based risotto, use vegetable broth and vegan butter and cheese. Add fresh vegetables for flavor and color.
Arborio rice is gluten-free, making risotto suitable for those with gluten intolerances. For low-carb diets, try cauliflower rice as a substitute.
Cool risotto before storing it in an airtight container in the fridge. Reheat with a splash of broth or water over gentle heat. Avoid microwaving on high to keep it creamy.
Once you’re good at making risotto, try other Italian dishes. Experiment with different ingredients and techniques. This will help you understand and appreciate Italian cuisine more.
Indulge in an easy-to-follow, delicious tiramisu recipe that brings the classic Italian treat to your table with rich mascarpone and bold coffee flavors.