I still remember the sound. That rhythmic scraping of coconut flesh against a metal grater — my tutu (grandmother) sitting on a low stool in the kitchen, working a halved coconut over a serrated edge, catching the shredded meat in a big stainless steel bowl below. She made it look effortless, but I learned quickly that grating a whole coconut is real work. She’d squeeze the shredded coconut through cheesecloth with her bare hands, the rich, white milk streaming out between her fingers. “This is real coconut milk,” she’d tell me. “Not that stuff in the can.”
Now, I’m not going to tell you that canned coconut milk is bad, it’s a perfectly good shortcut that I use all the time. But if you’ve never tasted fresh, homemade coconut milk, you’re missing something special. The flavor is cleaner, sweeter, and more fragrant than anything from a can. And for certain Hawaiian dishes, haupia, kulolo, coconut pudding, the difference is night and day.
What Is Homemade Coconut Milk?
Coconut milk is made by combining grated coconut flesh with water, then straining out the liquid. It’s that simple. The first pressing, with less water, produces thick coconut cream. Adding more water and pressing again gives you thinner coconut milk. In Hawaiian, coconut is called niu (nee-oo), and the coconut palm has been central to Hawaiian life for centuries — providing food, drink, oil, fiber, and building material.
There are two types of coconut milk you’ll get from this process:
- First press (coconut cream): Thick, rich, and high in fat. This is what you want for haupia and kulolo.
- Second press (coconut milk): Thinner and lighter, good for soups, curries, and cooking rice.
Why This Matters in Hawaiian Cooking
Coconut milk is a cornerstone of Hawaiian cuisine. It shows up in some of the most beloved and culturally significant dishes:
- Haupia: The classic coconut pudding dessert served at every lu’au and family gathering. Traditional haupia demands good coconut milk for its clean, pure flavor. Try it in our Haupia Smoothie for a drinkable take on this classic.
- Kulolo: A dense, sweet taro and coconut pudding that’s been made in Hawai’i for centuries. The quality of your coconut milk directly impacts the final dish.
- Coconut Rice: A simple but transformative side dish where coconut milk replaces some of the water in your rice cooker.
- Chicken Long Rice: Some versions use coconut milk for added richness.
- Poi Mochi: Coconut milk adds moisture and richness to this popular treat.
The coconut palm was one of the canoe plants, the essential plants that Polynesian voyagers brought with them when they settled Hawai’i. It’s deeply woven into the culture, and making coconut milk from scratch connects you to that tradition in a very tangible way. For more on essential Hawaiian ingredients, check out our complete guide to Hawaiian ingredients.
The Traditional Method: From Whole Coconut
What You’ll Need
- 1-2 mature brown coconuts (not the young green drinking coconuts)
- A hammer or the back of a heavy cleaver
- A butter knife or coconut grater
- A blender or food processor
- Cheesecloth or a nut milk bag
- A large bowl
- Hot water

Step 1: Choose Your Coconut
Pick up the coconut and shake it, you should hear plenty of water sloshing inside. That means it’s fresh. Avoid coconuts that feel light or don’t have liquid inside, and skip any with mold around the eyes (the three dark spots at one end). The shell should be intact with no cracks.
Step 2: Crack and Drain
First, pierce two of the three eyes with a screwdriver or sharp knife and drain the coconut water into a glass. (Drink it, it’s refreshing and nutritious, though it’s different from coconut milk.) Then wrap the coconut in a towel and give it a few firm whacks with a hammer along its equator. It should crack open into pieces. You can also bake it at 375°F for 15 minutes first, which makes the flesh shrink away from the shell and crack more easily.
Step 3: Remove the Flesh
Use a butter knife to pry the white flesh away from the shell. It’s okay if some of the thin brown skin stays on, it adds a slightly deeper flavor. If you want pure white milk for haupia, peel the brown skin off with a vegetable peeler.
Step 4: Grate or Blend
Traditionally, the flesh is grated by hand on a metal grater. This is the old-school method my tutu used, and it works beautifully, but it’s labor-intensive. The modern shortcut is to chop the coconut flesh into small pieces and pulse it in a blender or food processor with hot water. Use about 2 cups of hot water per coconut.
Blend on high for 2-3 minutes until the mixture is very fine and milky.
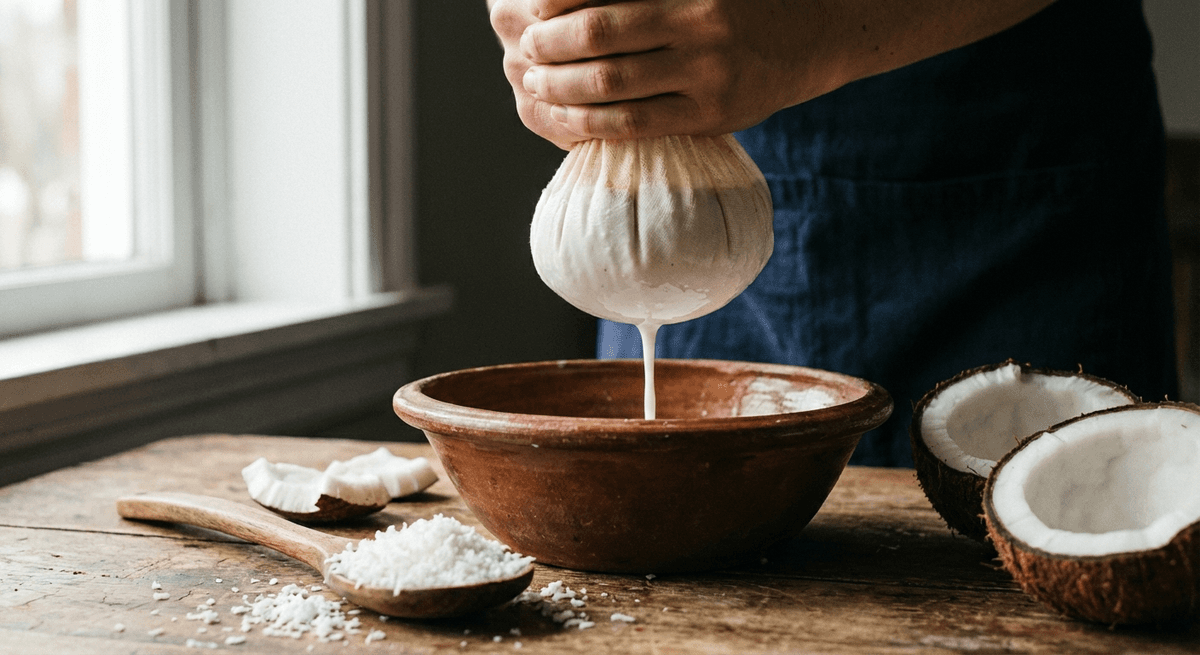
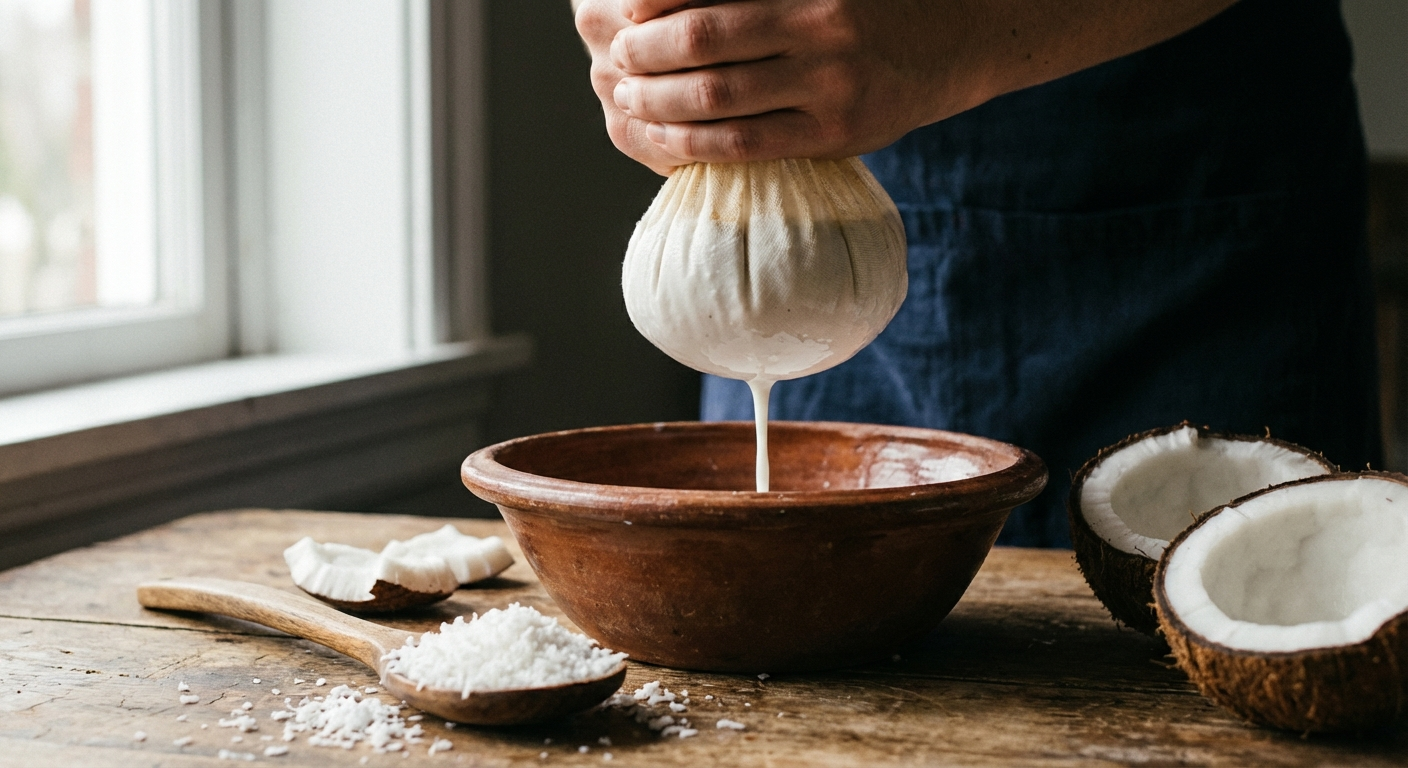
Step 5: Strain
Pour the blended mixture through cheesecloth or a nut milk bag into a large bowl. Gather the cloth and squeeze firmly, wringing out every last drop of liquid. This first pressing is your coconut cream — thick, rich, and rich.
For a second pressing, return the squeezed pulp to the blender, add another 2 cups of hot water, blend again, and strain. This thinner liquid is your coconut milk.
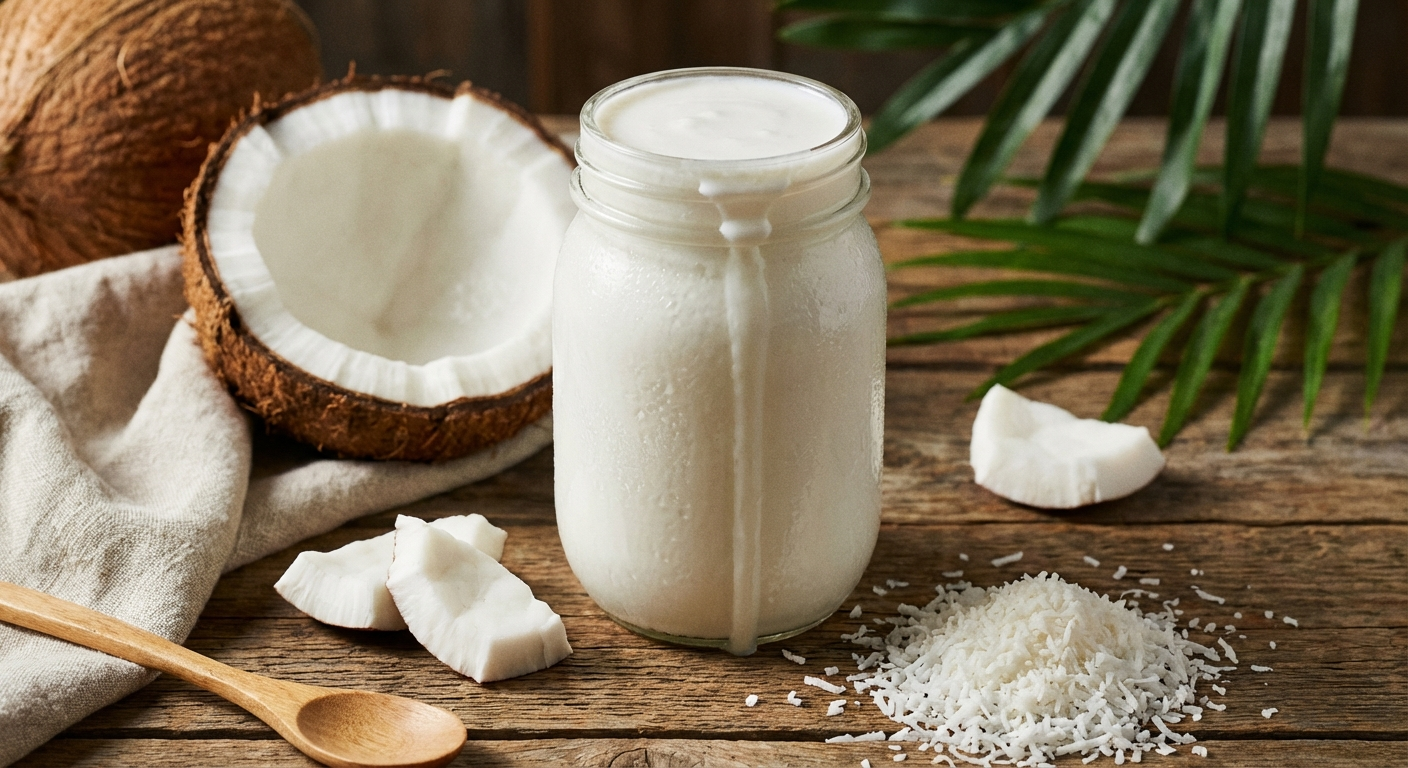
Yield
One mature coconut will give you roughly 1 cup of coconut cream (first press) and 1-2 cups of coconut milk (second press).
The Quick Method: From Dried Shredded Coconut
Don’t have access to whole coconuts? No problem. You can make excellent coconut milk from unsweetened dried shredded coconut, which is available at most grocery stores.
- Combine 2 cups of unsweetened shredded coconut with 3 cups of very hot (not boiling) water in a blender.
- Let it soak for 5 minutes.
- Blend on high for 2-3 minutes.
- Strain through cheesecloth, squeezing out all the liquid.
This yields about 2.5 cups of rich coconut milk. It won’t be quite as flavorful as fresh coconut, but it’s noticeably better than canned and perfect for haupia, kulolo, and most Hawaiian recipes.
How to Use Your Homemade Coconut Milk
For Haupia
Use the first-press coconut cream for the richest, most authentic haupia. The higher fat content gives you the best set and the cleanest coconut flavor.
For Kulolo
Combine both pressings, the cream adds richness while the thinner milk provides enough liquid for the taro to cook properly.
For Cooking
The second-press milk is perfect for cooking rice, making soups, and braising meats. It adds coconut flavor without being overwhelmingly rich.
For Desserts
Fresh coconut milk improves desserts like Butter Mochi and Chocolate Haupia Pie, where coconut flavor is front and center.
Storage Tips
- Refrigerator: Store in an airtight container for up to 3-4 days. The cream will separate and rise to the top, this is normal. Just stir or shake before using.
- Freezer: Pour into ice cube trays and freeze. Transfer frozen cubes to a zip-lock bag. They’ll keep for up to 3 months. This is great for having coconut milk on hand whenever you need it.
- Don’t worry about separation. Unlike canned coconut milk, fresh coconut milk will always separate. A quick stir brings it back together.
Canned Coconut Milk: When It’s Perfectly Fine
Let’s be practical — canned coconut milk is a pantry staple for a reason. For everyday cooking, stews, curries, and even a quick haupia, a good-quality full-fat canned coconut milk works well. Look for brands with minimal ingredients (coconut and water, maybe a small amount of guar gum). Avoid “lite” coconut milk for Hawaiian recipes, you need that fat for flavor and texture.
Save the homemade stuff for special occasions, when the coconut flavor really needs to shine, or when you want to impress at a potluck.
Key Things to Know
- Fresh coconut milk is noticeably better. The flavor is cleaner, sweeter, and more fragrant than canned.
- First press = cream, second press = milk. Use cream for rich desserts like haupia and kulolo; use milk for cooking.
- Dried shredded coconut works great. If you can’t find whole coconuts, unsweetened shredded coconut makes excellent milk.
- Use hot water, not boiling. Very hot water extracts more fat and flavor. Boiling water can give a cooked taste.
- Squeeze hard. The more you wring out of the cheesecloth, the more milk you get and the richer it will be.
- Separation is normal. Homemade coconut milk always separates. Just stir it back together.
- Coconut (niu) is a canoe plant. Making coconut milk from scratch connects you to centuries of Polynesian tradition.
There’s something meditative about making coconut milk by hand. The process slows you down and connects you to the ingredient in a way that cracking open a can never will. My tutu knew this, it wasn’t just about the end product, it was about the care and intention she put into every dish. Whether you’re preparing haupia for a special celebration or just want to experience the real thing, give homemade coconut milk a try. Your taste buds will thank you, and so would my tutu.


