There’s a Hawaiian saying: “He ali’i ka ‘āina; he kauwā ke kanaka”: the land is chief; man is its servant. And at the heart of that relationship between the Hawaiian people and the land is kalo (KAH-loh) — taro. In Hawaiian cosmology, kalo is not just a crop; it’s family. According to the Kumulipo, the Hawaiian creation chant, kalo is the elder brother of the Hawaiian people, born from the union of Wākea (Sky Father) and Ho’ohōkūkalani. Every time you cook with taro, you’re connecting with something deeply sacred.
I’ll be honest, the first time I tried to cook taro on my own, I made some mistakes. I didn’t cook it long enough and my mouth tingled for an hour (more on that later). I’ve since learned the right way to handle this incredible ingredient, and I want to share everything I know so you can work with kalo confidently and respectfully.
What Is Taro (Kalo)?
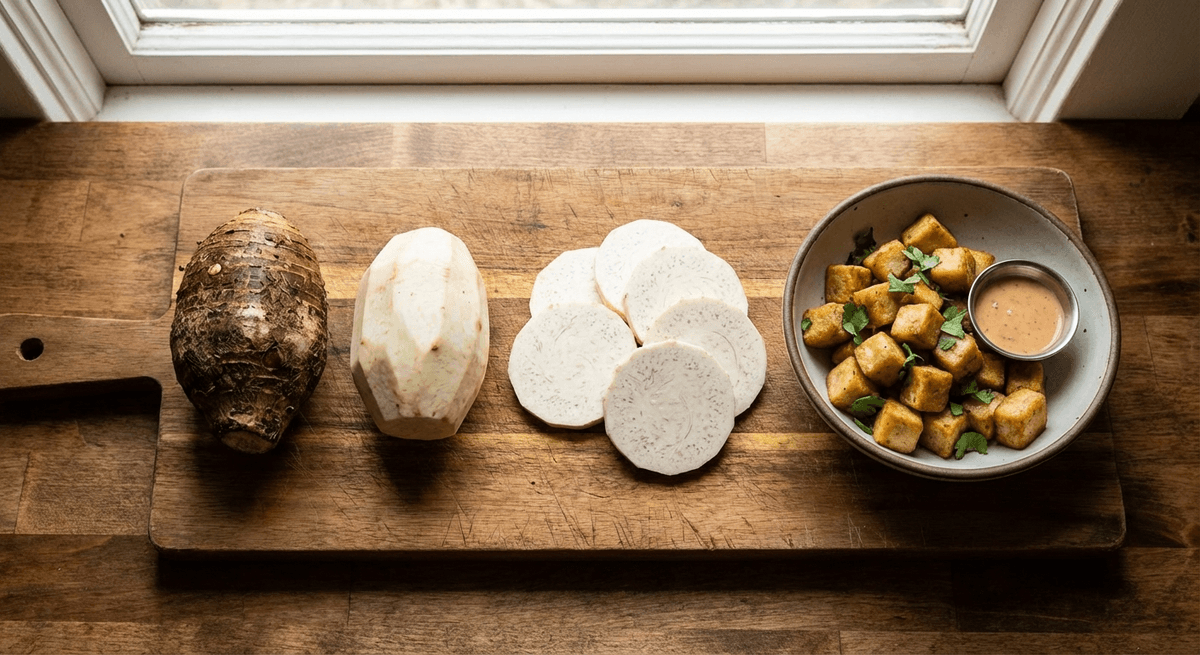
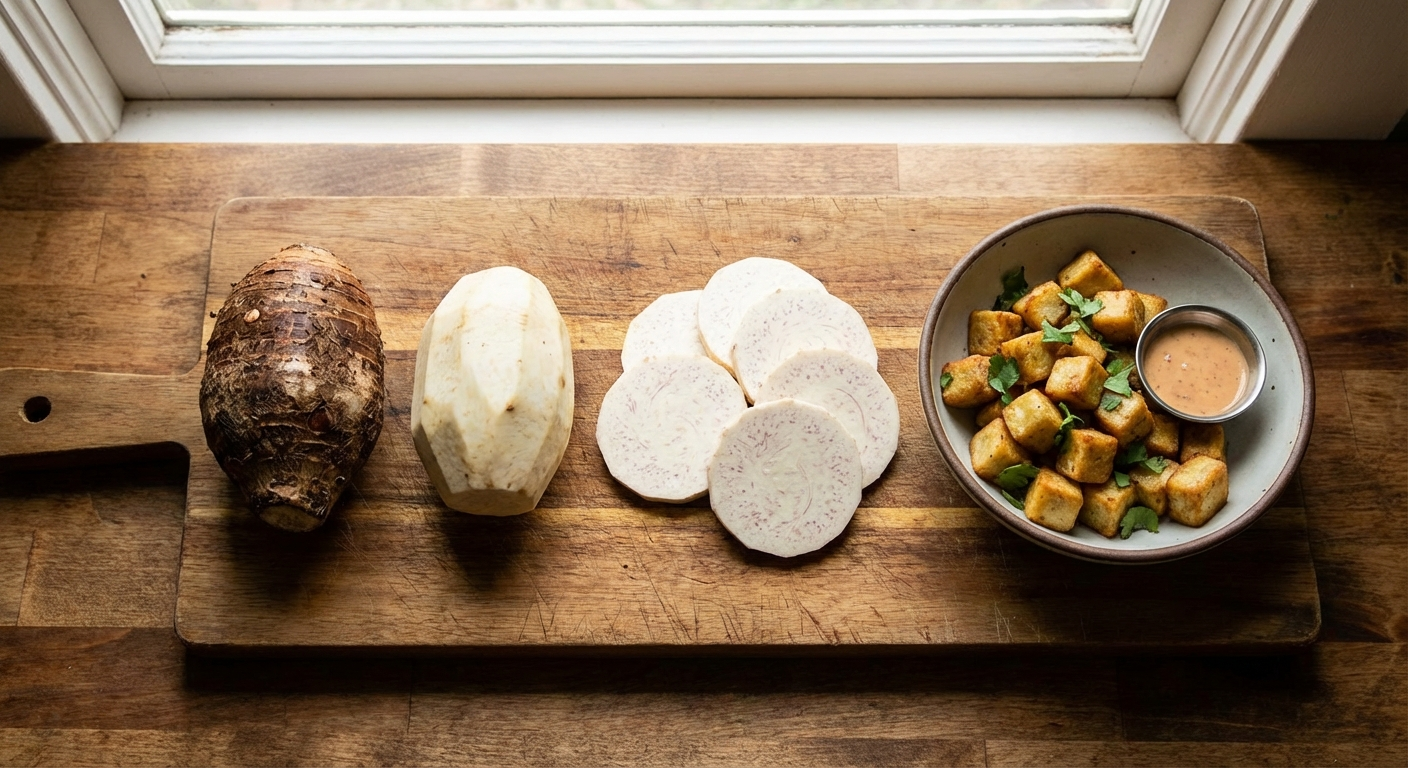
Taro, or kalo in Hawaiian, is a starchy root vegetable (technically a corm) that has been cultivated in Hawai’i for over a thousand years. It was the most important food crop for Native Hawaiians and remains deeply significant today. The corm, the underground part that looks like a hairy, rough-skinned potato, is the part most commonly eaten, though the leaves (lū’au) are also edible when cooked properly.
Taro comes in many varieties — Hawaiian farmers traditionally cultivated over 300 varieties of kalo, each with different flavors, textures, and uses. The most common variety you’ll find on the mainland is the large, barrel-shaped taro with white or purple-flecked flesh.
Taro is one of the original canoe plants, the essential crops that Polynesian voyagers carried with them across the Pacific when they settled Hawai’i. For more on kalo and other traditional Hawaiian ingredients, see our guide to Hawaiian ingredients.
Why This Matters in Hawaiian Cooking
Kalo is foundational to Hawaiian cuisine and culture:
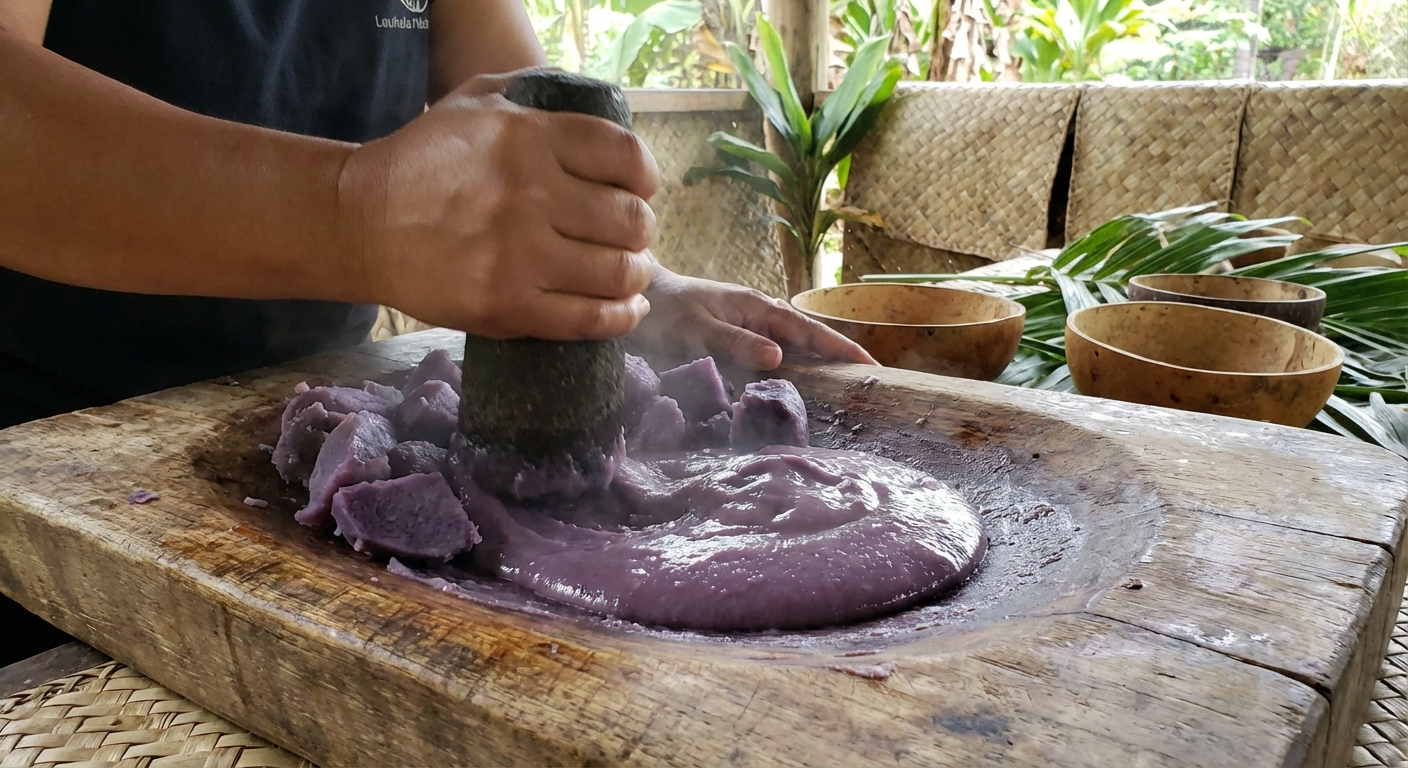
- Poi: The most classic Hawaiian food — mashed, fermented taro that has sustained the Hawaiian people for centuries. It’s still served at every lu’au and many family meals.
- Laulau: Taro leaves are used to wrap pork and fish before steaming, creating one of Hawai’i’s most beloved dishes. Try our traditional laulau recipe once you’re comfortable handling the leaves.
- Kulolo: A traditional dessert made from grated taro and coconut milk, steamed until dense and sweet. Our kulolo recipe is a great place to put your prepped taro to use.
- Taro chips: Thinly sliced and fried, taro makes incredible chips with a nutty, earthy flavor.
- Taro bread and rolls: A beloved Hawaiian bakery item with a distinctive purple color and sweet flavor.
Beyond cooking, kalo represents sustainability, family, and respect for the land. The taro plant’s structure, the parent corm surrounded by smaller offshoots called ‘ohā, is the origin of the word ‘ohana (family). When you work with kalo, you’re participating in a tradition that is both culinary and cultural. To understand the broader significance of taro in Hawaiian gatherings, read our Talk Story: The Luau.
Important Safety Information: Calcium Oxalate
Before we get into preparation, there’s one critical thing you need to know: raw taro is toxic. Both the corm and the leaves contain calcium oxalate crystals, which are needle-shaped irritants that cause intense itching, burning, and swelling in the mouth and throat if consumed raw or undercooked.
This is not something to take lightly. Here’s how to stay safe:
- Never eat raw taro. Always cook it thoroughly — boiling, steaming, or baking until completely soft.
- Wear gloves when peeling. The raw corm can cause skin irritation in some people. Disposable kitchen gloves solve this.
- Cook taro leaves for a long time. Lū’au (taro leaves) need at least 45 minutes to an hour of cooking to break down the calcium oxalate. Many recipes call for even longer.
- Adding baking soda helps. A small amount of baking soda in the cooking water helps neutralize the calcium oxalate more quickly.
Once properly cooked, taro is completely safe and incredibly nutritious — rich in fiber, potassium, and vitamins.
How to Select and Store Taro
Buying Taro
On the mainland, you can find taro at Asian grocery stores, Latin American markets (where it may be called malanga or dasheen), and some well-stocked supermarkets. Look for:
- Firm corms with no soft spots or mold
- A fresh, earthy smell — avoid any that smell sour or fermented
- Unbroken skin without excessive damage
- Medium size for the most consistent texture (roughly the size of a large potato)
Storage
- Uncooked: Store in a cool, dry, dark place (like potatoes). Use within a week for best quality.
- Cooked: Refrigerate in an airtight container for up to 5 days.
- Frozen: Cooked taro freezes well. Cube or mash it first, then store in freezer bags for up to 3 months.
How to Prep Taro
Step 1: Wash Thoroughly
Taro grows in flooded fields (lo’i) or wet soil, so the corms can be quite dirty. Scrub them well under running water with a vegetable brush.
Step 2: Peel (With Gloves)
Put on disposable gloves. Using a sharp vegetable peeler or paring knife, remove the rough, hairy outer skin. The flesh underneath will be white, cream-colored, or have purple specks depending on the variety. The surface may feel slightly slimy, this is normal and will disappear with cooking.
Step 3: Cut
Cut the peeled taro into pieces based on your recipe:
- For boiling: Cut into 1-2 inch chunks for even cooking.
- For steaming: Cut into 1-inch cubes or leave in larger pieces.
- For chips: Slice as thin as possible with a mandoline.
- For kulolo: Grate finely using a box grater or food processor.
Place cut taro in water immediately to prevent browning, it oxidizes quickly, just like potatoes.
Cooking Methods
Boiling (Best for Beginners)
This is the simplest and most foolproof method.
- Place taro chunks in a large pot and cover with cold water by 2 inches.
- Add a generous pinch of salt and an optional half teaspoon of baking soda.
- Bring to a boil, then reduce to a steady simmer.
- Cook for 25-45 minutes, depending on the size of your pieces. Test with a fork, it should slide in easily with no resistance, similar to a well-cooked potato.
- Drain and use as desired.
Boiled taro can be mashed for poi, cubed for stews, or eaten simply with butter and salt.
Steaming
Steaming preserves more of taro’s nutrients and gives a slightly drier, denser texture.
- Place taro pieces in a steamer basket over boiling water.
- Cover and steam for 30-45 minutes until tender.
- Test with a fork for doneness.
Steamed taro is excellent mashed, or served as a starchy side alongside a plate lunch.
Baking/Roasting
Roasting brings out taro’s natural sweetness and creates a wonderful caramelized exterior.
- Preheat your oven to 400°F.
- Toss peeled, cubed taro with oil, salt, and pepper.
- Spread on a baking sheet in a single layer.
- Roast for 30-40 minutes, flipping halfway through, until golden and tender.
Frying (Taro Chips)
Taro chips are a beloved Hawaiian snack with an earthy, nutty crunch.
- Slice peeled taro paper-thin using a mandoline.
- Soak slices in cold water for 30 minutes, then pat completely dry.
- Fry in 350°F oil in small batches until golden and crispy, about 2-3 minutes.
- Drain on paper towels and season immediately with Hawaiian sea salt.
Working with Taro Leaves (Lū’au)
Taro leaves, called lū’au (loo-OW), are the tender tops of the taro plant. They’re used in the dish also called lau lau and in squid lū’au (a creamy stew of taro leaves and squid). The same calcium oxalate warning applies, they must be cooked thoroughly.
- Remove the thick central stem from each leaf.
- Boil or braise the leaves for at least 45 minutes to 1 hour.
- They will reduce dramatically in volume, similar to spinach.
- When properly cooked, they’re soft, silky, and have a flavor similar to spinach but richer and more complex.
Fresh taro leaves can be difficult to find on the mainland. Check Hawaiian or Filipino grocery stores, or farmers’ markets in areas with Pacific Islander communities.
Tips for Mainland Cooks
- Check Asian and Latin grocery stores first. Taro is widely used in many cuisines and is more available than you might think.
- Frozen taro is a good option. Many Asian markets carry peeled, frozen taro that’s ready to cook. It saves time and the quality is solid.
- Don’t substitute purple yam (ube). Ube and taro are different plants with different flavors and textures. They are not interchangeable.
- Be patient with cooking time. Undercooked taro is not just unpleasant, it’s irritating to eat. When in doubt, cook it longer.
- If you experience tingling, the taro wasn’t cooked long enough. It’s not dangerous, but it’s uncomfortable. Drink milk or eat dairy to help soothe the irritation.
Key Things to Know
- Kalo is sacred in Hawaiian culture. It’s considered the elder brother of the Hawaiian people. Handle it with respect and understanding.
- Never eat taro raw. Always cook it thoroughly to neutralize the calcium oxalate crystals.
- Wear gloves when peeling. The raw corm can irritate your skin.
- Boiling is the easiest method. Cook until fork-tender, usually 25-45 minutes depending on the size of your pieces.
- Taro leaves also need thorough cooking. A minimum of 45 minutes of boiling or braising for safety.
- Ube and taro are not the same. Don’t confuse them, they have different flavors and culinary uses.
- Taro connects you to Hawaiian tradition. Cooking with kalo is participating in a practice that spans over a thousand years of Hawaiian history.
Working with kalo for the first time can feel intimidating, but once you understand the basics, peel with gloves, cook it fully, and treat it with respect, it opens up a whole world of Hawaiian cooking. From simple boiled taro with butter and salt to the complex art of making poi, kalo is an ingredient that rewards your effort and connects you to one of the oldest and most beautiful food traditions in the Pacific. Take your time, do it right, and enjoy the journey.


