Every house in Hawaii with a lilikoi vine knows the situation: you either have zero passion fruit or you have hundreds.
When the vine goes off, you're scrambling to use them. Juice. Jam. Butter. Frozen pulp. And these bars – always these bars.
What Is Lilikoi?
Lilikoi is the Hawaiian word for passion fruit. The purple-skinned variety grows wild throughout the islands, climbing fences and trees.
The flavor is intensely tropical – tart, aromatic, floral, sweet. Lilikoi is one of those fruits that tastes exactly like Hawaii smells.
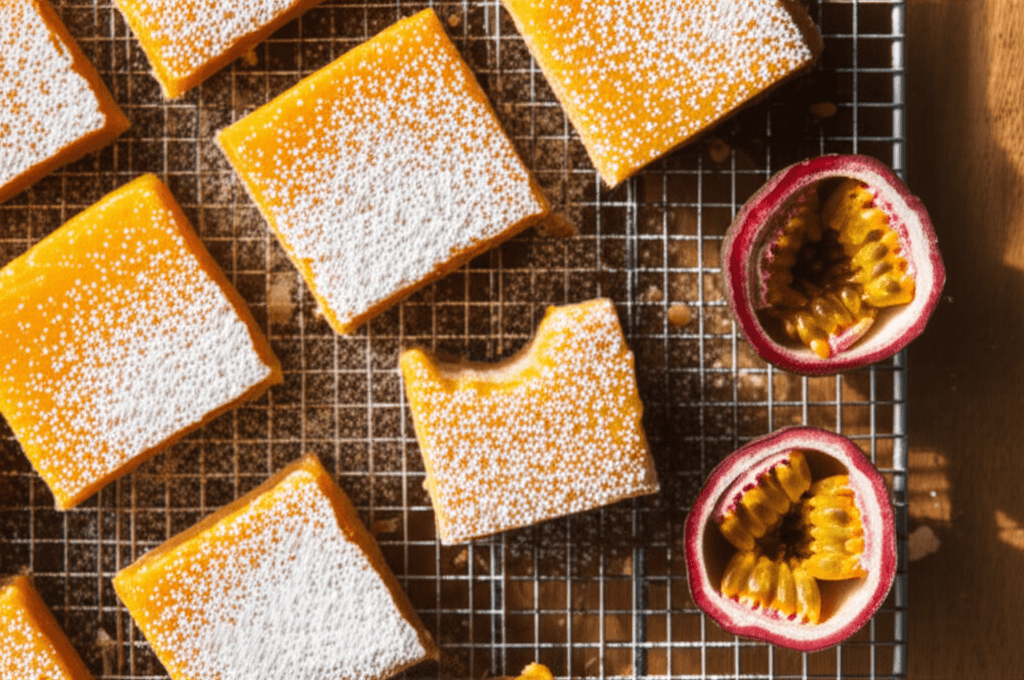
Lilikoi Bars
Tangy passion fruit curd on a buttery shortbread crust – Hawaii's tropical twist on the classic lemon bar. Bright, sunny, and dangerously addictive.
Prep Time: 20 minutes | Cook Time: 45 minutes | Chill Time: 2 hours | Servings: 16 bars
Ingredients
For the Shortbread Crust:
- 1 cup (2 sticks) butter, softened
- ½ cup powdered sugar
- 2 cups all-purpose flour
- ¼ teaspoon salt
For the Lilikoi Filling:
- 4 large eggs
- 1½ cups granulated sugar
- ½ cup fresh lilikoi (passion fruit) pulp and juice (about 6-8 fruits)
- ¼ cup fresh lemon juice
- ¼ cup all-purpose flour
- ½ teaspoon baking powder
For Topping:
- Powdered sugar, for dusting
Instructions
- Make the Crust: Preheat oven to 350°F. Line a 9x13 inch pan with parchment. Beat butter and powdered sugar until creamy. Add flour and salt. Press evenly into pan. Bake 18-20 minutes until edges are lightly golden.
- Make the Filling: Prepare lilikoi – cut passion fruits in half, scoop pulp into a fine-mesh strainer. Press to extract juice. Whisk eggs and sugar. Add lilikoi juice, lemon juice, flour, baking powder. Whisk until smooth.
- Bake: Pour filling over hot crust. Bake 22-25 minutes until filling is set but still slightly jiggly in center.
- Cool and Chill: Cool completely in pan. Refrigerate at least 2 hours until firm.
- Serve: Cut into squares. Dust generously with powdered sugar.
Storage: Refrigerate up to 4 days. Can be frozen up to 2 months.


