
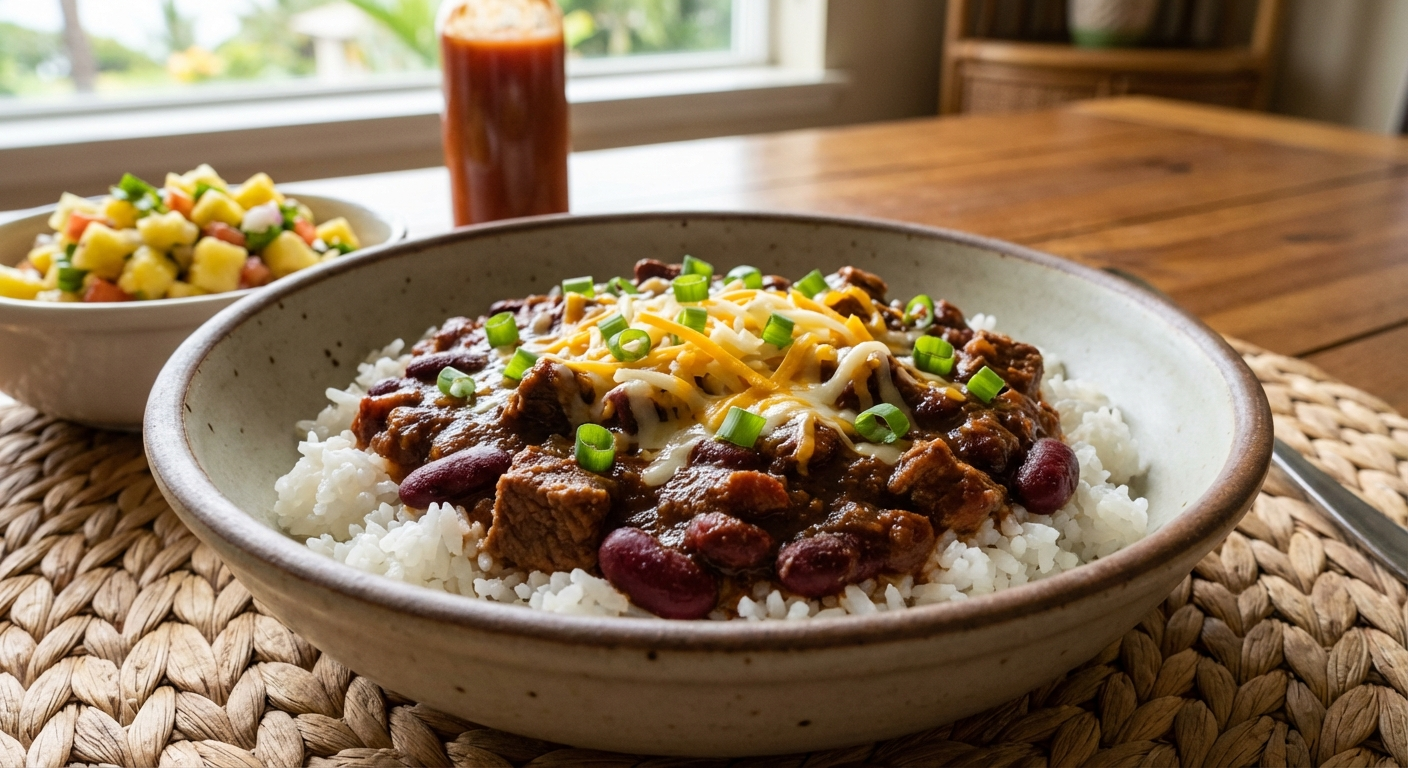
Hawaiian chili is its own thing. if someone puts a bowl of it in front of you with crackers on the side, they’re not from here. In Hawaii, chili goes over rice. Always. That’s not negotiable. A big scoop of hot white rice in the bottom of the bowl, thick chili ladled on top, buried under a mountain of grated cheddar cheese and a handful of diced raw onion. That’s how we do it, and that’s how it’s been done at every diner, school cafeteria, and family kitchen across the islands for as long as anyone can remember.
I think about the chili at Zippy’s, if you grew up in Hawaii, you know exactly what I’m talking about. That specific chili with the specific rice and the specific way they pile the cheese on top so it melts into this gooey, savory mess. It’s not trying to be Texas chili or Cincinnati chili or anything from the mainland. It’s its own thing. Simpler, maybe. Less smoky, less complex in that chili-head kind of way. But it hits different because it’s ours. It’s the bowl you want on a rainy Hilo evening when the clouds roll down off Mauna Kea, or on a cool night Upcountry Maui when the temperature actually drops enough to make you reach for a sweatshirt. It lives in the same comfort food family as Hawaiian Beef Stew and Oxtail Soup — both are slow-simmered, served over rice, and taste even better the next day.
My version stays true to that local-style soul — ground beef, kidney beans, tomatoes, and a few island touches that set it apart from the mainland stuff. A splash of soy sauce for that umami depth, a little brown sugar for balance, and enough garlic and ginger to let you know you’re eating food that grew up in the Pacific, not the plains.
What Makes Hawaiian Chili Different
Hawaiian chili isn’t about heat, it’s about comfort. While Texas chili prides itself on chili peppers and no beans, and Cincinnati chili goes wild with cinnamon and chocolate, Hawaii’s version is straightforward and satisfying. It’s a thick, meaty, tomatoey chili that’s designed to be served over rice. The rice isn’t optional, it’s structural. It soaks up the sauce, balances the richness, and turns the whole bowl into something that sticks to your ribs.
The other thing that sets it apart is the toppings. In Hawaii, chili always comes with grated cheddar cheese (lots of it) and diced raw white onion on top. The cheese melts into the hot chili and the raw onion gives it a sharp, fresh bite that cuts through all that richness. It’s a simple formula, but it works perfectly every single time. If you want to dial up the heat, check out our Hawaiian Chili Peppers and Hot Sauce Guide for ideas on adding some island fire.
How Chili Became a Hawaii Thing
Chili came to Hawaii through the American military presence and mainland transplants, but like every dish that touches island soil, it was adapted and adopted. Plantation-era workers from different backgrounds contributed their own touches — Portuguese workers brought their love of hearty stews like Portuguese bean soup, Japanese families added soy sauce for depth, and the ever-present rice bowl culture of the islands dictated that chili would be served over rice, not with bread or crackers.
By the 1960s and 70s, chili and rice had become a staple at local restaurants and diners. Zippy’s, the beloved Hawaii chain, made their version classic, it became the benchmark that every local cook either emulated or tried to beat. Schools served it in cafeterias. Families made big pots of it for potlucks and football Sundays. It became comfort food in the truest sense, the kind of dish that doesn’t need to impress anyone because everyone already loves it. It’s not fancy. It’s not Instagram-worthy in that modern food blogger way. It’s just good, honest food that makes you feel like you’re home.
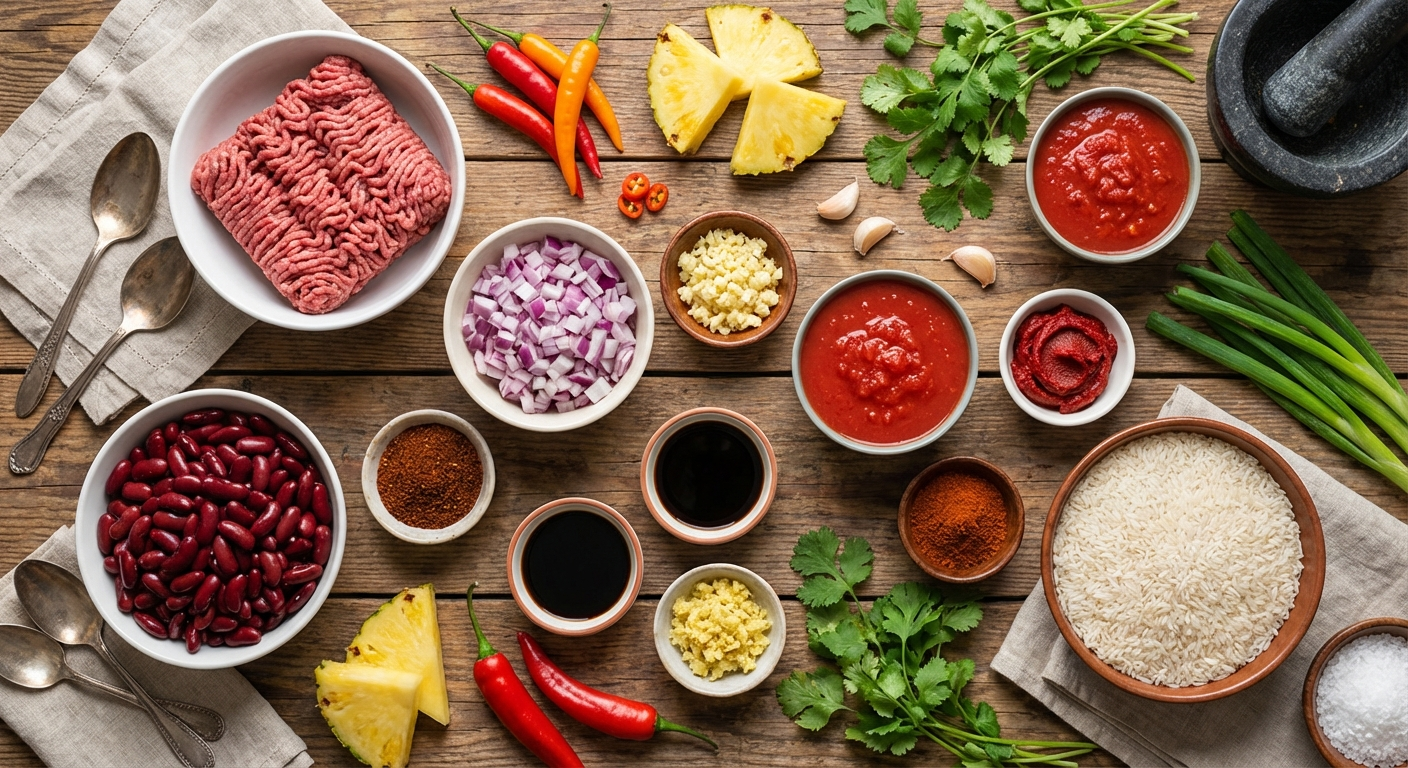
For the Chili
For Serving
Build the Base
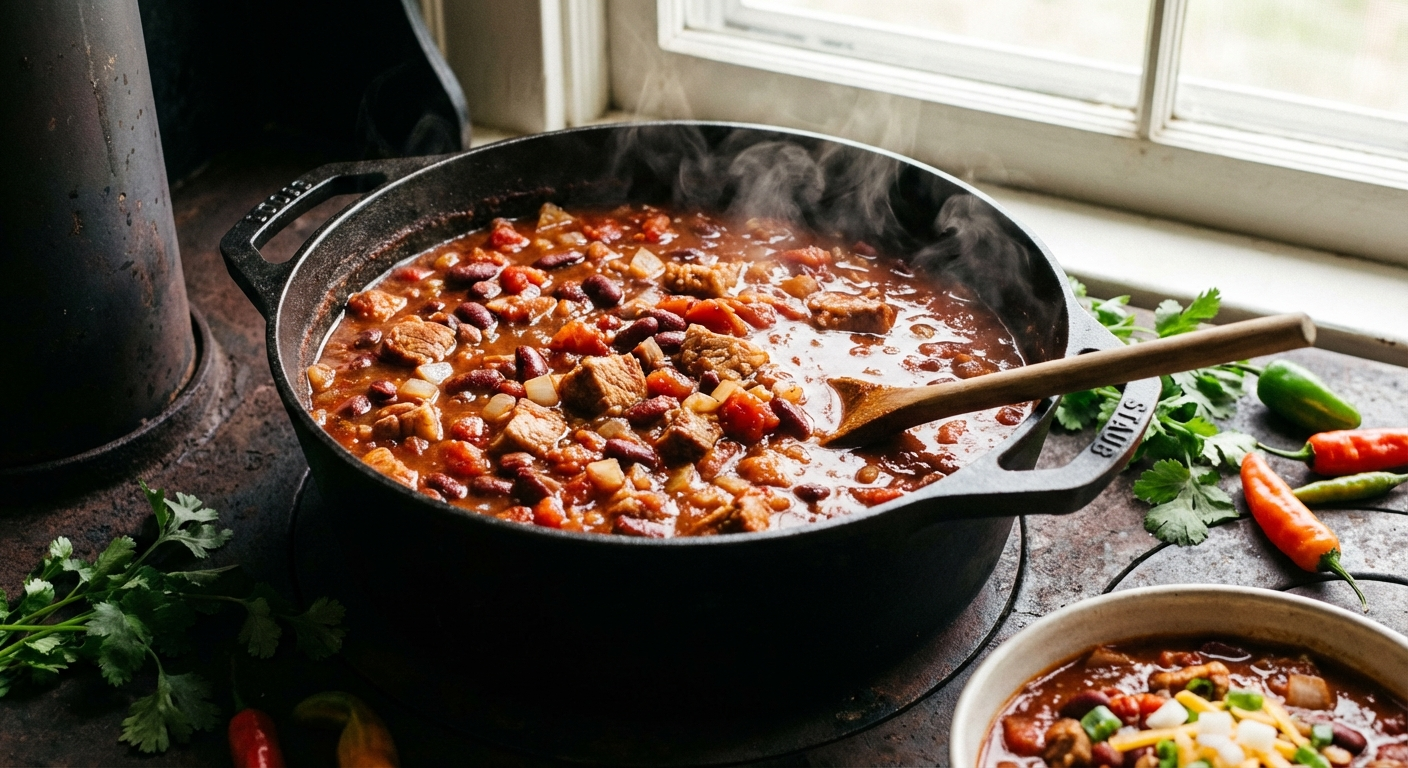
Simmer the Chili
Serve Local-Style
Tips for the Best Hawaiian Chili
- Use 80/20 ground beef: You need some fat for flavor. Lean ground beef makes dry, bland chili. If you’re worried about grease, you can drain some off after browning, but leave some in the pot — that’s flavor you’re pouring out.
- Don’t skip the soy sauce: This is the local touch that makes Hawaiian chili taste like Hawaiian chili. It adds an umami depth that chili powder and cumin alone can’t achieve. You won’t taste “soy sauce” in the final dish, you’ll just taste a chili that somehow has more depth than usual.
- Make it the day before: Like most stews, chili is even better the next day after the flavors have had time to marry. Make a big pot on Sunday and eat it through the week.
- Keep the toppings traditional: Grated cheddar and raw white onion are the classic Hawaii toppings. Keep it simple. The cheese should be freshly grated if possible, the pre-shredded stuff has coatings that prevent it from melting as smoothly.
- Scale up easily: This recipe doubles beautifully. Big pot of chili is always a good idea, it freezes well and reheats perfectly for quick meals.
Serving Suggestions
There’s really only one way to serve Hawaiian chili, and that’s over hot steamed white rice with plenty of grated cheddar and diced onion on top. That said, a side of sweet cornbread doesn’t hurt if you’re feeling fancy. Some folks like to add a dollop of sour cream or a few shakes of hot sauce — Tabasco or your favorite Hawaiian chili pepper water both work. For a real local-style spread, serve the chili alongside some mac salad and call it dinner. Leftovers make great chili cheese fries the next day.
More Island Comfort Recipes
If this local-style chili hits the spot, warm up with these other comforting favorites:
- Hawaiian Beef Stew — another bowl of local comfort that’s even better the next day
- Hamburger Steak — Hawaii’s gravy-smothered plate lunch classic
- Pork Adobo — Filipino-Hawaiian braised perfection
Prep Time: 15 minutes
Cook Time: 1 hour
Total Time: 1 hour 15 minutes
Servings: 6–8


